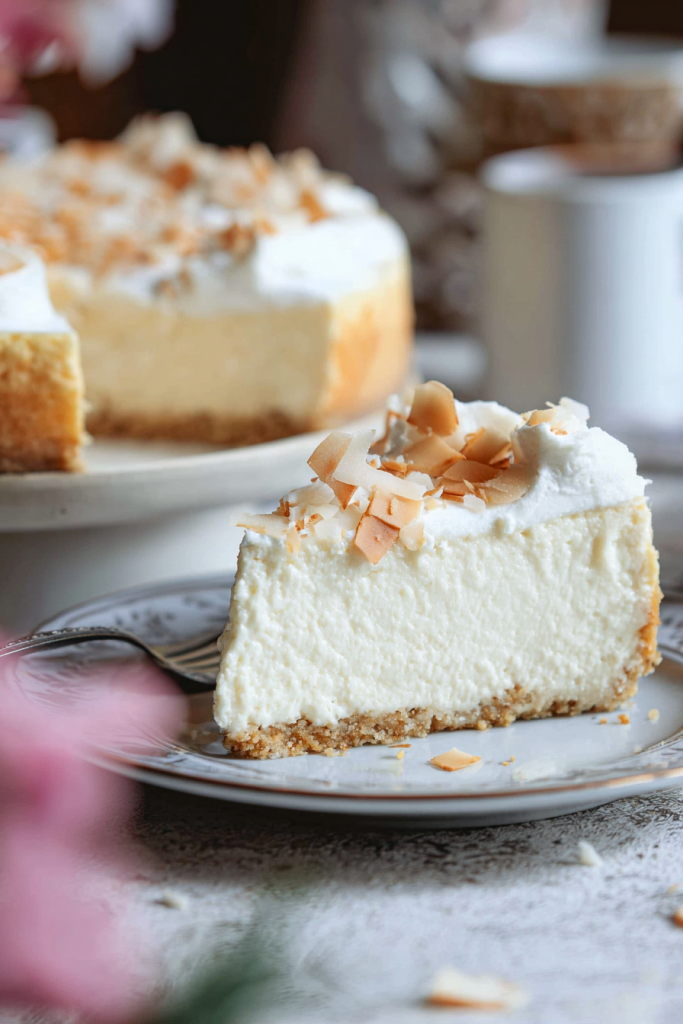
I’ll never forget the first time I made this keto coconut cheesecake for a family gathering. My aunt, a notorious carb lover, took one bite and declared it impossible that something this decadent could be sugar-free. That’s the magic of this recipe. It delivers all the creamy, tropical indulgence you crave without derailing your low-carb lifestyle.
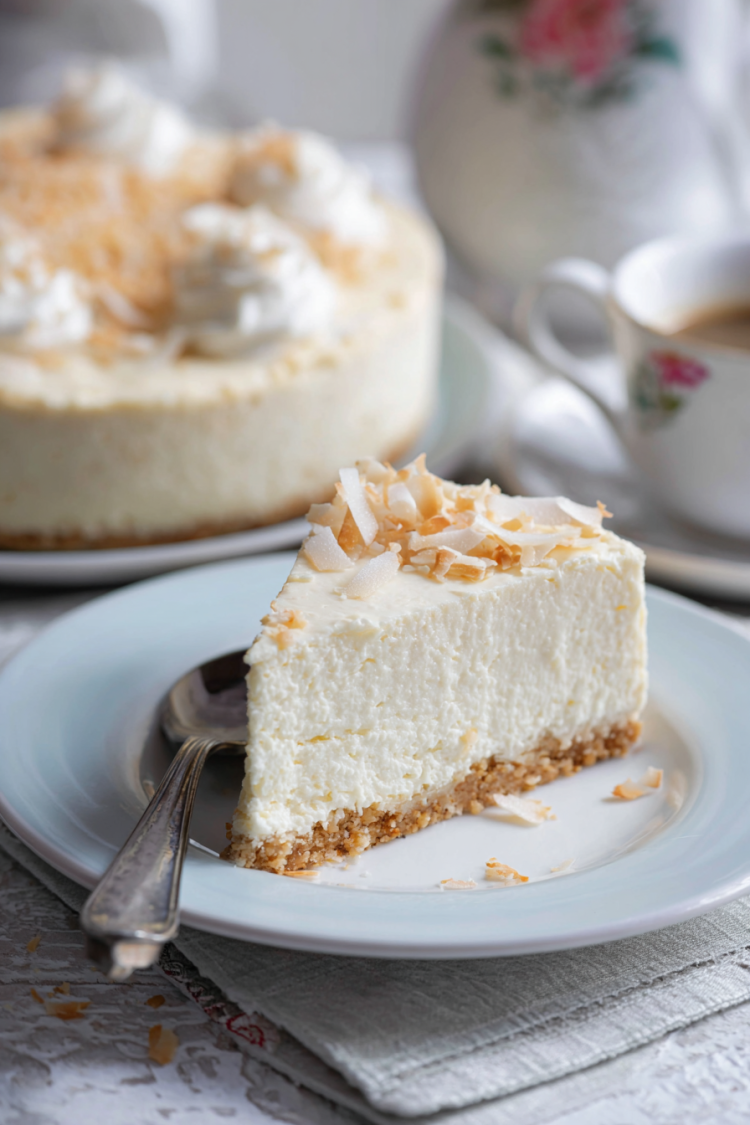
This isn’t just another keto dessert that tastes “good for keto.” This is a show-stopping cheesecake that rivals any traditional version. The macadamia nut crust provides a buttery crunch. The coconut-infused filling is silky smooth. And the whipped cream topping with toasted coconut adds the perfect finishing touch.
Why You’ll Love This Keto Coconut Cheesecake
Unbelievably Creamy Texture
I’ve spent years perfecting my cheesecake technique. This recipe uses every trick I know to achieve a perfectly smooth, crack-free filling. The secret lies in bringing all ingredients to room temperature and beating the cream cheese properly. When you follow my method, you’ll get restaurant-quality results every time.
A Crust That Actually Tastes Amazing
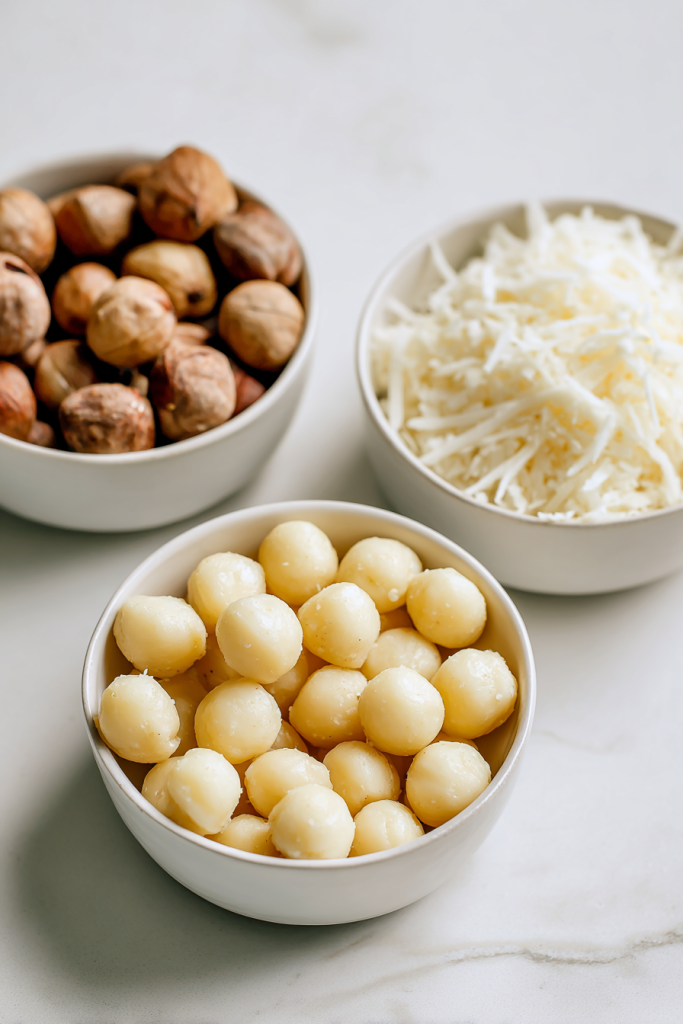
Most keto cheesecake crusts are forgettable at best. This one is different. I combine raw macadamia nuts with shredded coconut for a crust that’s both crunchy and flavorful. The slight sweetness complements the creamy filling perfectly. It’s substantial enough to hold up the cheesecake but never feels heavy.
Tropical Flavor Without Overwhelming Sweetness
I’m careful with the coconut extract in this recipe. You want that tropical essence without it tasting artificial or overpowering. The coconut cream adds richness while the extract provides depth. Together, they create a balanced flavor that tastes like a vacation in every bite.
Completely Sugar-Free and Gluten-Free
Like all my recipes, this cheesecake contains no added sugar and no gluten whatsoever. I use granular sweetener that measures like sugar but has minimal impact on blood glucose. The result is a dessert that fits seamlessly into your keto lifestyle without compromising on taste.
Impressive but Achievable
Yes, this recipe takes some time. But I promise the process is straightforward when you follow my instructions. I’ve broken down each step to make it foolproof. Even if you’ve never made a cheesecake before, you can master this recipe.
What Makes This Recipe Special
I developed this recipe after trying countless coconut desserts that fell short. Some were too dense. Others had artificial flavoring. Many had that “keto” taste that’s hard to ignore. I wanted something that would genuinely impress anyone who tasted it.
The breakthrough came when I started using coconut cream instead of regular cream. Coconut cream is thicker and richer than coconut milk. It’s the white, fatty layer that rises to the top of a can of full-fat coconut milk. This ingredient adds incredible creaminess while boosting the coconut flavor naturally.
I also experimented with different nut crusts before settling on macadamia nuts. They have a buttery flavor that pairs beautifully with coconut. Unlike almonds, which can be bitter, macadamias add a subtle richness. Combined with the shredded coconut, they create a crust that’s worthy of the filling.
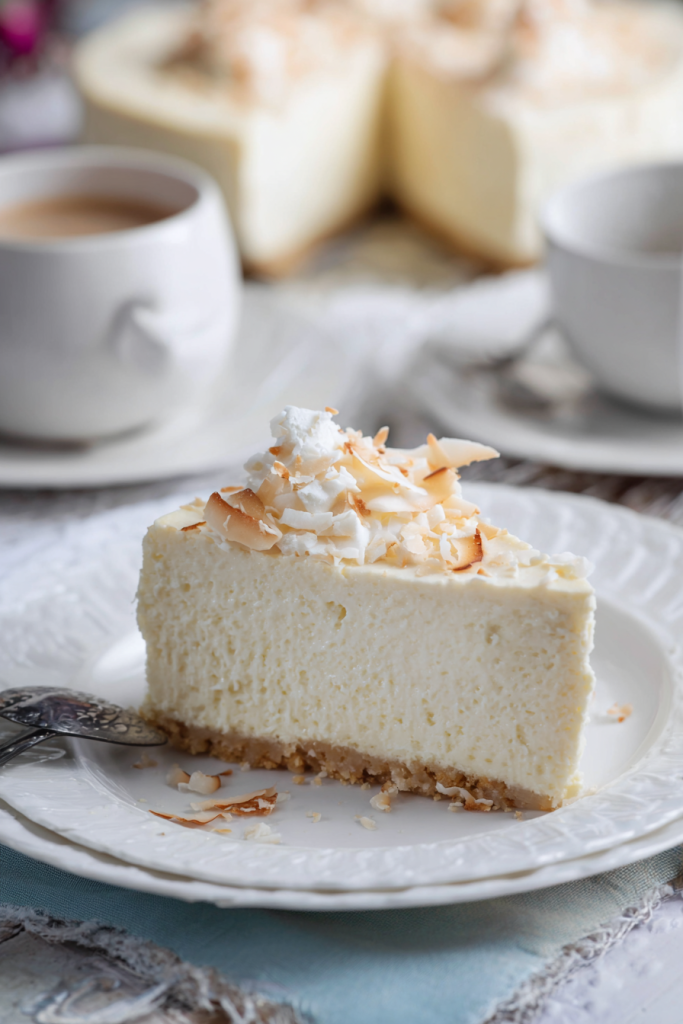
The topping took several attempts to perfect as well. I tried various combinations before deciding on a simple whipped cream with toasted coconut flakes. Sometimes simple is best. The lightly toasted coconut adds a lovely textural contrast and visual appeal.
Prep Time: 20 minutes | Cook Time: 90 minutes | Chill Time: 4 hours | Total Time: 5 hours 50 minutes
Servings: 12 | Difficulty: Moderate
Ingredients & Detailed Instructions
Ingredients You’ll Need
| Ingredient | Quantity | Notes |
|---|---|---|
| CRUST | ||
| Raw macadamia nuts | 3/4 cup (100.5 g) | Must be raw, not roasted |
| Finely shredded coconut, unsweetened | 3/4 cup (60 g) | Fine shred works best for crust |
| Granular sweetener | 3 tbsp | Erythritol-based recommended |
| Salt | 1/4 tsp | Enhances flavors |
| Melted butter or oil | 2 tbsp | Binds the crust together |
| FILLING | ||
| Cream cheese | 1 1/2 lbs (680.39 g) | Full-fat, very well softened |
| Granular sweetener | 2/3 cup (126.67 g) | Adjust to taste preference |
| Coconut cream, canned | 1/2 cup (120 g) | Room temperature, thick white layer |
| Coconut extract | 1 tsp | Pure extract, not imitation |
| Vanilla extract | 1/2 tsp | Pure vanilla recommended |
| Large eggs | 3 | Room temperature is crucial |
| TOPPING | ||
| Whipping cream | 3/4 cup (177.44 ml) | Cold, full-fat |
| Powdered sweetener | 2 tbsp | Dissolves smoothly in cream |
| Vanilla or coconut extract | 1/2 tsp | Either works beautifully |
| Large flaked coconut | 1/2 cup (42.5 g) | Toasted before adding |
Step-by-Step Instructions
Prepare Your Pan and Oven
Preheat your oven to 325°F. Line the bottom of a 9-inch springform pan with parchment paper. This prevents sticking and makes removal easier later. Place the springform pan on a large baking sheet. This catches any butter that might leak during baking.
Make the Macadamia Coconut Crust
Add the raw macadamia nuts to your food processor. Process on high speed until they resemble coarse crumbs. You want a texture similar to breadcrumbs, not a fine powder. This takes about 30 seconds in most food processors.
Transfer the processed nuts to a medium bowl. Stir in the finely shredded coconut, sweetener, and salt until evenly distributed. Pour in the melted butter and stir thoroughly. The mixture should hold together when pressed between your fingers.
Press the crust mixture firmly and evenly into the bottom of your prepared springform pan. Use the bottom of a measuring cup to compact it. This ensures a sturdy base that won’t crumble when you slice the cheesecake.
Bake the Crust
Place the pan on the baking sheet in your preheated oven. Bake for 12 to 14 minutes. The crust should just begin to brown around the edges. Don’t overbake or it will become too hard. Remove from the oven and let it cool completely while you prepare the filling.
Reduce your oven temperature to 300°F. This lower temperature prevents the cheesecake from cracking and ensures even cooking.

Beat the Cream Cheese to Perfection
This step is critical for a smooth, lump-free cheesecake. Make sure your cream cheese is very soft. I usually leave mine on the counter for at least two hours. In a large mixing bowl, beat the cream cheese alone on medium speed for 1 to 2 minutes. It should look completely smooth and creamy.
Add the granular sweetener, coconut cream, coconut extract, and vanilla extract. Beat on medium speed until thoroughly combined. Scrape down the sides of the bowl and the beaters. This ensures everything is evenly mixed.
Incorporate the Eggs Carefully
Add the eggs one at a time. Beat each egg just until incorporated before adding the next. Overbeating can incorporate too much air, which leads to cracks. After each egg, scrape down the sides of the bowl and the beaters.
The batter should be smooth and pourable but not thin. If you taste it now (before the eggs are added), you can adjust the sweetness. This is your last chance to make flavor adjustments.
Bake with a Water Bath Effect
Pour the filling over your cooled crust. Smooth the top with a spatula. Place the whole setup on the center rack of your oven. On the rack below, place a large baking dish filled with hot water. This creates humidity that prevents cracking.
Bake at 300°F for 70 to 90 minutes. The edges should be set and slightly puffed. The center should still jiggle slightly when you gently shake the pan. This jiggle means it’s perfectly done. It will firm up as it cools.
Cool Gradually to Prevent Cracking
Turn off the oven and crack the door open. Let the cheesecake sit in the cooling oven for 30 minutes. This gradual temperature change prevents the top from cracking. After 30 minutes, remove it from the oven completely.
Run a sharp knife around the edges of the pan. This releases any areas that might have stuck. Let the cheesecake come to room temperature on the counter. This takes about 2 hours.
Chill Thoroughly
Once at room temperature, cover the cheesecake with plastic wrap. Refrigerate for at least 4 hours, though overnight is even better. This chilling time is essential. The cheesecake needs to set properly and the flavors need time to meld.
Prepare the Topping
When ready to serve, make the whipped cream topping. In a chilled bowl, beat the cold whipping cream with the powdered sweetener and extract. Beat until stiff peaks form. Don’t overbeat or it will become grainy.
Spread the whipped cream over the chilled cheesecake. Sprinkle generously with toasted coconut flakes. To toast coconut, spread it on a baking sheet and bake at 325°F for 5 to 7 minutes. Watch carefully as it burns quickly.
Tips, Storage & FAQ
My Best Tips for Success
Temperature Matters More Than You Think
This is the most important tip I can give you. All filling ingredients must be at room temperature. Cold eggs will cause the cream cheese to seize and form lumps. Cold coconut cream will create an uneven texture. I set everything out at least 2 hours before starting.
I even warm my cream cheese slightly beyond room temperature. I microwave it for 10 seconds at a time until it’s very soft. You want it spreadable, not cold and firm. This extra step ensures the smoothest possible filling.
Beat the Cream Cheese Solo First
Before adding anything else, beat the cream cheese by itself for 1 to 2 minutes. This breaks down any lumps and creates a perfectly smooth base. It’s tempting to skip this step, but don’t. This is what separates amateur cheesecakes from professional ones.
Add Eggs Last and Don’t Overbeat
Adding eggs last gives you a chance to taste the filling first. You can adjust sweetness and flavoring before committing. When you do add eggs, beat each one just until incorporated. Overbeating incorporates too much air, which causes cracks and an uneven texture.
Use a Baking Sheet Under the Pan
Even the best springform pans can leak butter during baking. Placing your pan on a baking sheet catches any drips. This prevents smoke and keeps your oven clean. It also makes moving the hot pan much easier and safer.
Create Humidity in the Oven
The pan of water on the lower rack creates a humid environment. This prevents the top of your cheesecake from drying out and cracking. I fill a 9×13 baking dish with hot tap water. The steam makes a noticeable difference in the final texture.
Understanding Sweetener Choices
For the Crust: Erythritol Only
The crust needs an erythritol-based sweetener to crisp properly. Allulose and xylitol retain too much moisture. They’ll keep your crust soft and prevent it from achieving that satisfying crunch. I use brands like Swerve or Lakanto Monk Fruit with Erythritol.
For the Filling: More Flexibility
The filling is more forgiving with sweetener choices. You can use allulose, but be aware it may cause the cake to brown faster. I keep a close eye on it and tent foil over the top if it’s browning too quickly.
I personally prefer a 50/50 blend of erythritol and allulose in the filling. Erythritol provides bulk while allulose adds a softer sweetness without the cooling effect. This combination tastes most like traditional sugar to me.
Concentrated Sweeteners Work Too
You can use pure stevia extract or monk fruit extract in the filling and topping. Start with a tiny amount and taste as you go. These sweeteners vary dramatically in concentration. Some are 200 times sweeter than sugar, others are 300 times sweeter.
Storage and Make-Ahead Instructions
Refrigerator Storage
Store your cheesecake covered in the refrigerator for up to 5 days. I use plastic wrap directly on the surface, then cover the whole thing with foil. The whipped cream topping is best added fresh before serving. If already topped, it will soften after a day but still tastes delicious.
Freezing Instructions
This cheesecake freezes beautifully for up to 3 months. Freeze it without the whipped cream topping. Wrap tightly in plastic wrap, then in foil. Thaw overnight in the refrigerator before serving. Add fresh whipped cream and toasted coconut just before serving.
Making Components Ahead
You can bake the crust up to 2 days in advance. Store it covered at room temperature. You can also toast the coconut flakes ahead. Store them in an airtight container at room temperature for up to a week.
Frequently Asked Questions
Can I use a different nut for the crust?
Yes, but the flavor will change. Pecans work well and provide a slightly sweeter, more traditional taste. Almonds work too, though they can be slightly bitter. I’d avoid walnuts as they’re too assertive and will overpower the coconut. Whatever nut you choose, keep it raw to prevent over-roasting during baking.
My cheesecake cracked on top. What went wrong?
Cracks usually happen from temperature shock or overbeating. Make sure all ingredients are room temperature before mixing. Don’t overbeat the eggs. Let the cheesecake cool gradually in the oven with the door cracked. If it still cracks, don’t worry. The whipped cream topping covers any imperfections beautifully.
Can I make this without coconut extract?
Absolutely. Simply increase the vanilla extract to 1 teaspoon total. The coconut cream still provides plenty of coconut flavor. The extract just amplifies it. You’ll still have a delicious cheesecake, just with a milder coconut taste.
Is there a dairy-free version of this recipe?
I haven’t tested this recipe dairy-free, so I can’t guarantee results. You’d need to replace the cream cheese with a keto-friendly dairy-free alternative. Coconut cream already replaces regular cream. The butter in the crust can be replaced with coconut oil. The whipping cream would need a coconut cream substitute specifically designed for whipping.
How do I know when the cheesecake is done?
The edges should be set and slightly puffed. The center should jiggle slightly when you gently shake the pan. Think of barely-set Jello. If the center looks liquid or ripples, it needs more time. If there’s no jiggle at all, you’ve slightly overbaked it. It will still taste good but might be denser than ideal.
Final Thoughts
This keto coconut cheesecake has become my go-to dessert for special occasions. It impresses every single time. The combination of textures and flavors creates something truly special. The crunchy crust, creamy filling, and light whipped topping work together perfectly.
Don’t be intimidated by the multiple steps. Take your time and follow each instruction carefully. The result is absolutely worth the effort. When you slice into this beautiful cheesecake and see those perfect layers, you’ll feel like a professional baker.
I encourage you to make this for your next gathering. Watch as people’s faces light up with that first bite. Then enjoy the moment when you tell them it’s completely sugar-free and keto-friendly. That’s the moment that makes all the effort worthwhile.
Nutritional Information (per slice, 12 servings):
Calories: 385 | Fat: 38g | Protein: 7g | Total Carbs: 8g | Fiber: 2g | Net Carbs: 6g
Have you tried this recipe? I’d love to hear how it turned out! Leave a comment below with your experience and any variations you tried.
Keto Coconut Cheesecake
Ingredients
- Crust:
- 3/4 cup raw macadamia nuts 100.5 g
- 3/4 cup finely shredded coconut unsweetened (60 g)
- 3 tbsp granular sweetener
- 1/4 tsp salt
- 2 tbsp melted butter or oil
- Filling:
- 1 1/2 lbs cream cheese very well softened (680.39 g)
- 2/3 cup granular sweetener 126.67 g
- 1/2 cup coconut cream canned, room temperature (120 g)
- 1 tsp coconut extract
- 1/2 tsp vanilla extract
- 3 large eggs room temperature
- Topping:
- 3/4 cup whipping cream 177.44 ml
- 2 tbsp powdered sweetener
- 1/2 tsp vanilla or coconut extract
- 1/2 cup large flaked coconut lightly toasted (42.5 g)
Instructions
- Prepare Pan and Oven:
- Preheat oven to 325°F. Line the bottom of a 9-inch springform pan with parchment paper and place on a large baking sheet.
- Make the Crust:
- Process raw macadamia nuts in a food processor until they resemble coarse crumbs (about 30 seconds).
- Transfer to a bowl and stir in shredded coconut, sweetener, and salt.
- Add melted butter and stir until mixture holds together when pressed.
- Press crust mixture firmly and evenly into the bottom of the prepared pan.
- Bake the Crust:
- Bake at 325°F for 12-14 minutes until edges just begin to brown. Remove and let cool completely.
- Reduce oven temperature to 300°F.
- Make the Filling:
- Beat cream cheese alone on medium speed for 1-2 minutes until super smooth and creamy.
- Add sweetener, coconut cream, coconut extract, and vanilla extract. Beat until well combined.
- Add eggs one at a time, beating just until incorporated after each addition. Scrape down bowl and beaters after each egg.
- Bake the Cheesecake:
- Pour filling over cooled crust and smooth the top.
- Place springform pan on center oven rack. On the rack below, place a large baking dish filled with hot water.
- Bake at 300°F for 70-90 minutes until edges are set but center still jiggles slightly.
- Cool the Cheesecake:
- Turn off oven and crack door open. Let cheesecake sit in cooling oven for 30 minutes.
- Remove from oven and run a sharp knife around the edges of the pan.
- Let come to room temperature (about 2 hours), then cover and refrigerate for at least 4 hours or overnight.
- Prepare Topping:
- Beat whipping cream, powdered sweetener, and extract until stiff peaks form.
- Spread over chilled cheesecake and sprinkle with toasted coconut flakes.
Notes
Sweetener for Crust: Use only erythritol-based sweeteners for the crust to achieve proper crispness. Allulose or xylitol will keep it soft.
Sweetener for Filling: More flexible – can use erythritol, allulose, or a blend. Allulose may cause faster browning; tent with foil if needed.
Toasting Coconut: Spread flaked coconut on a baking sheet and bake at 325°F for 5-7 minutes. Watch carefully as it burns quickly.
Storage: Refrigerate covered for up to 5 days. Freeze (without topping) for up to 3 months. Add fresh whipped cream before serving.
Preventing Cracks: Use room temperature ingredients, don’t overbeat eggs, cool gradually in the oven, and use the water bath method for humidity.
Nutrition per serving (1/12 of cheesecake): 385 calories | 38g fat | 7g protein | 8g total carbs | 2g fiber | 6g net carbs