This keto coconut flour mug cake is my absolute favorite quick dessert fix. Some nights, after a long day, I just need something sweet without breaking my keto diet. I’ve tried countless dessert recipes over the years, but most require too much effort or too many ingredients. That’s when I discovered this coconut flour mug cake – my ultimate quick-fix dessert.
I remember the first time I made this recipe. I was craving chocolate cake but didn’t want to bake a whole batch. I grabbed my favorite coffee mug, mixed a few simple ingredients, and popped it in the microwave. Two minutes later, I had a warm, fluffy cake that satisfied my sweet tooth completely.
What makes this recipe special is how forgiving it is. I’ve made it tired, distracted, and even while chatting on the phone. It turns out perfect every single time. No fancy equipment needed – just a mug, a fork, and your microwave.
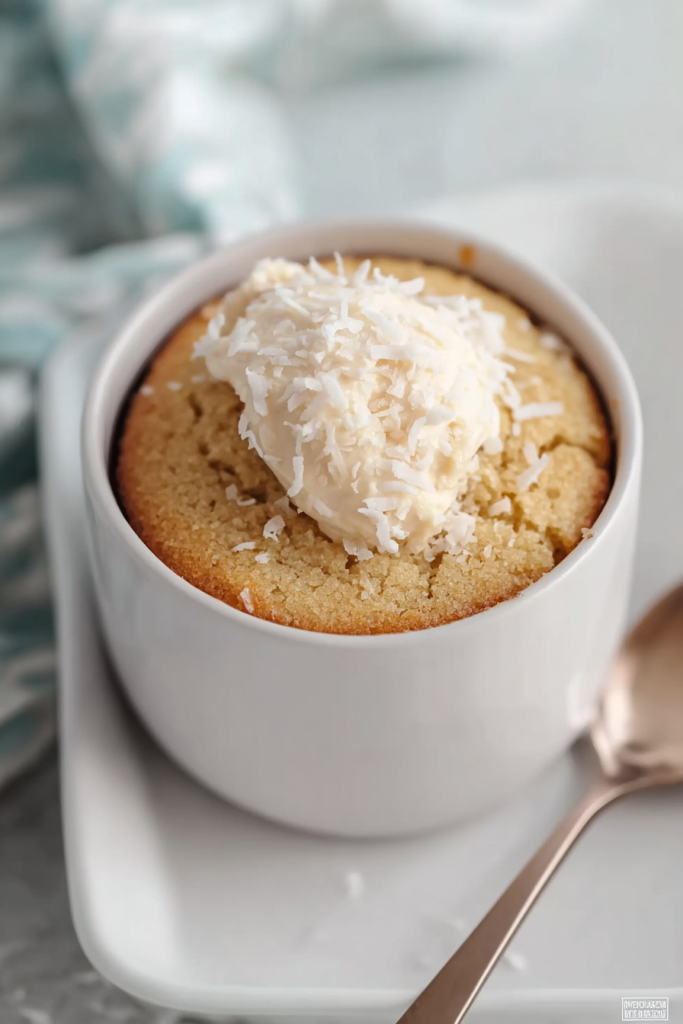
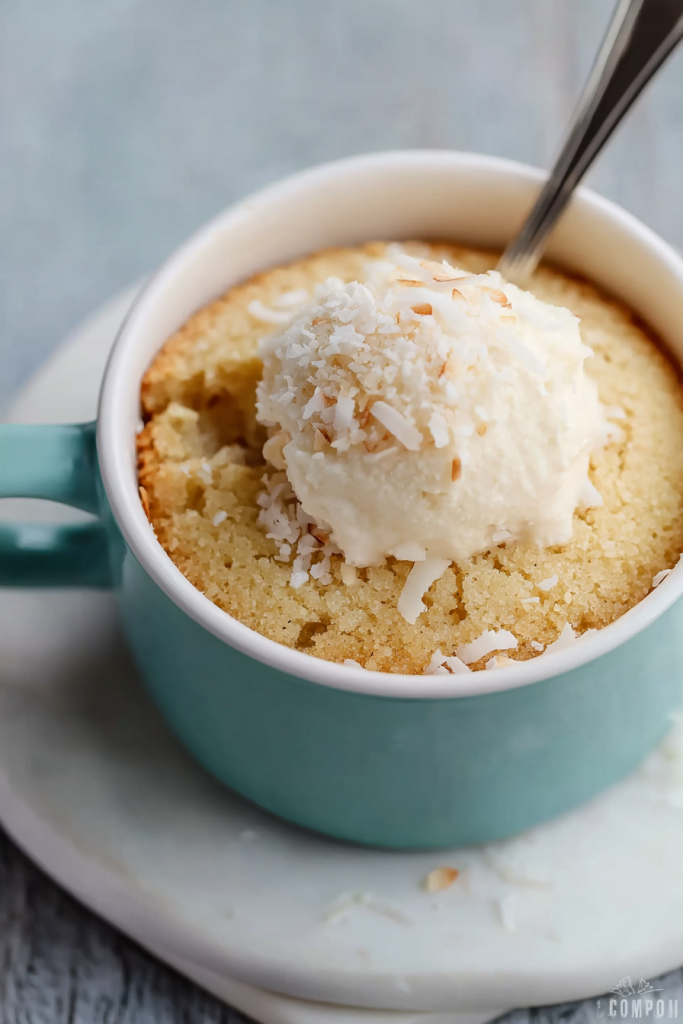
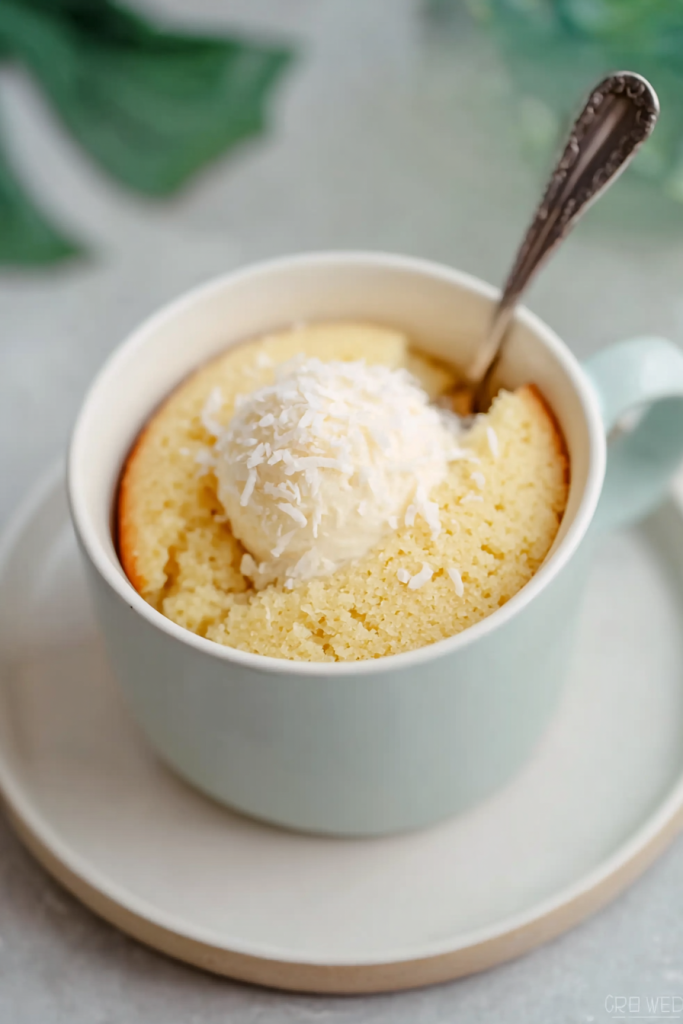
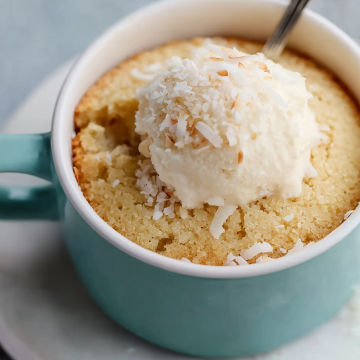
The texture amazed me from that first bite. Unlike many keto desserts that taste dry or artificial, this mug cake is moist and tender. The coconut flour gives it a slightly sweet, tropical flavor that works beautifully with the vanilla essence.
I now make this cake at least twice a week. Sometimes I eat it plain, other times I add sugar-free chocolate chips or a dollop of whipped cream. My family has learned that when I disappear to the kitchen for five minutes, I’m probably making my famous mug cake.
Why You’ll Love This Mug Cake
Lightning-fast preparation – This dessert comes together in under three minutes of active prep time, making it perfect for spontaneous sweet cravings.
Perfect keto macros – With coconut flour and sugar-free sweetener, this cake fits your low-carb lifestyle while delivering authentic cake texture and flavor.
Single-serving solution – No temptation to overeat when the recipe makes exactly one portion, helping you maintain your diet goals effortlessly.
Pantry-friendly ingredients – Everything you need is probably sitting in your kitchen right now, so you can satisfy cravings immediately.
Zero cleanup stress – Mix and cook in the same mug, leaving you with just one dish to wash afterward.
Customization options – Add cocoa powder, cinnamon, or extracts to create different flavor variations whenever you want something new.
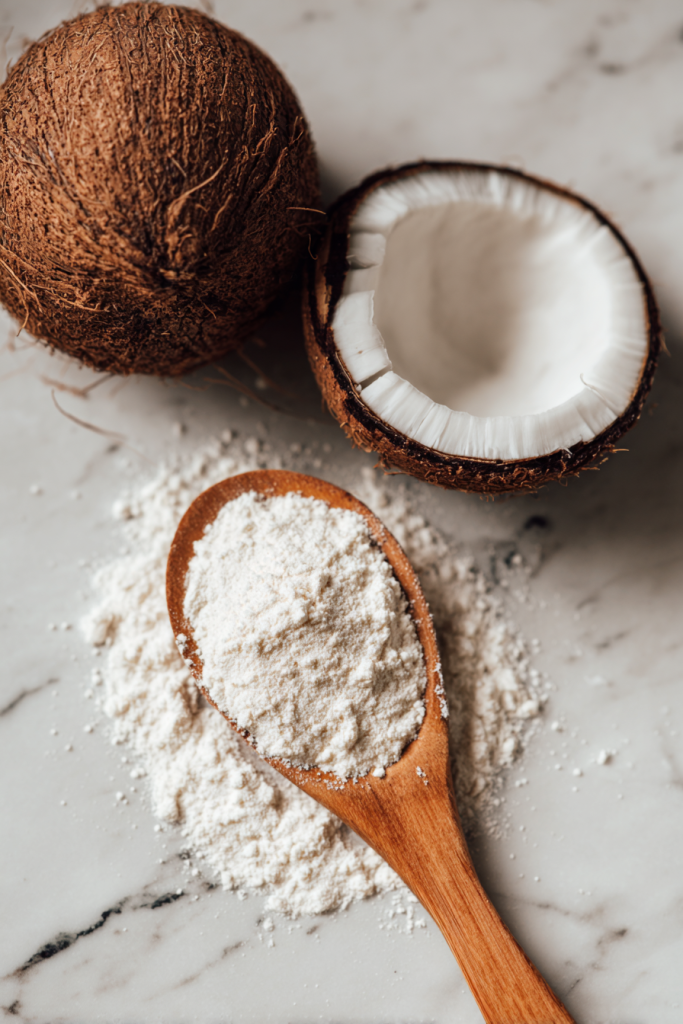
What Makes Coconut Flour Special for This Recipe?
Coconut flour behaves completely differently from regular wheat flour. It absorbs about four times more liquid than all-purpose flour, which is why you only need two tablespoons for this entire cake. This super-absorbent quality means you can’t swap it one-to-one with other flours without adjusting the recipe.
I learned this the hard way when I first started keto baking. I tried doubling the coconut flour once, thinking I’d get a bigger cake. Instead, I ended up with something resembling a hockey puck. Coconut flour needs the right ratio of wet to dry ingredients to create that perfect, fluffy texture.
The flavor is another reason I love using coconut flour. It adds a subtle sweetness and a hint of tropical taste without overpowering the cake. Even people who don’t usually like coconut can’t detect a strong coconut flavor in this recipe.
When buying coconut flour, freshness matters more than brand. Old coconut flour that’s been sitting in your pantry for months can become clumpy and lose its ability to absorb moisture properly. I keep mine in an airtight container in a cool, dark place to maintain freshness.
Smart Substitutions That Actually Work
Sometimes you need to make swaps based on what’s available in your kitchen. Here are substitutions I’ve personally tested:
Coconut flour alternatives: Almond flour works, but you’ll need 5-6 tablespoons instead of 2 tablespoons coconut flour. The texture will be denser and more muffin-like rather than cake-like.
Sour cream replacements: Full-fat Greek yogurt creates a tangier flavor profile. Cream cheese makes the cake richer and denser. Heavy cream works well but produces a slightly lighter texture.
Butter options: Coconut oil gives a more pronounced coconut flavor. Ghee works perfectly if you’re dairy-sensitive. Make sure any substitute is softened to room temperature before mixing.
Sweetener flexibility: I use Joy Filled Eats sweetener, but erythritol, monk fruit sweetener, or allulose all work beautifully. Start with the same measurement and adjust to your taste preference.
Egg considerations: Unfortunately, the egg is non-negotiable for this recipe. It provides structure, moisture, and helps the cake rise properly. Without it, you won’t get cake-like results.
Recipe Details & Instructions
Ingredients You’ll Need
| Ingredient | Quantity | Notes |
|---|---|---|
| Butter | 1 tablespoon | Softened to room temperature, not melted |
| Coconut flour | 2 tablespoons | Use spoon-and-level method, don’t pack |
| Sour cream | 1 tablespoon | Full-fat works best for moisture |
| Egg | 1 large | Room temperature preferred |
| Joy Filled Eats sweetener | 1½ tablespoons | Or substitute with erythritol or monk fruit |
| Vanilla essence | 1 teaspoon | Pure extract gives best flavor |
| Baking powder | ¼ teaspoon | Fresh baking powder ensures proper rise |
Preparation Time: 5 minutes
Cooking Time: 1-2 minutes
Total Time: 6-7 minutes
Servings: 1
Difficulty Level: Easy
Step-by-Step Instructions
Step 1: Prepare Your Mug
Choose a microwave-safe mug that holds at least 12 ounces. I prefer ceramic mugs because they heat evenly. Lightly grease the inside with butter or coconut oil to prevent sticking.
Step 2: Mix Wet Ingredients
Add the softened butter, sour cream, egg, sweetener, and vanilla essence to your mug. Use a fork to whisk everything together vigorously for about 30 seconds. You want the mixture completely smooth with no egg streaks visible.
Step 3: Add Dry Ingredients
Sprinkle the coconut flour and baking powder over the wet mixture. Whisk again with your fork until no lumps remain. The batter should be thick but pourable, similar to pancake batter consistency.
Step 4: Microwave
Place your mug in the center of the microwave. Cook on high power for 60 seconds first. Check the center – it should be set but still slightly moist on top. If needed, microwave for an additional 15-30 seconds.
Step 5: Cool and Enjoy
Let the mug cake cool for 1-2 minutes before eating. The center will continue cooking slightly during this time. Eat it straight from the mug or turn it out onto a plate.
Common Mistakes to Avoid
The biggest problem I see people encounter is using too much coconut flour. Even an extra half tablespoon can make your cake dry and crumbly. Always measure carefully using the spoon-and-level method rather than scooping directly from the bag.
Overcooking is another frequent issue. Microwaves vary significantly in power, so your timing might differ from mine. Start with less time and add more if needed. A slightly undercooked mug cake is better than an overcooked one because the residual heat continues cooking it.
Make sure your butter is softened, not melted. Melted butter changes the texture and can make the cake greasy. I leave my butter on the counter for about 30 minutes before making this recipe.
Skipping the whisking step leads to eggy pockets in your finished cake. Take the extra 30 seconds to thoroughly combine your wet ingredients before adding the dry ones. This ensures even distribution and smooth texture throughout.
Perfect Pairings and Serving Suggestions
This mug cake tastes incredible on its own, but sometimes I like to dress it up. A spoonful of sugar-free whipped cream adds richness without many extra carbs. I keep a can of whipping cream in my fridge specifically for this purpose.
For chocolate lovers, sugar-free chocolate chips melted on top create an indulgent finish. I microwave a tablespoon of chips for 15 seconds and drizzle it over my cake. The contrast between warm cake and melted chocolate is heavenly.
Fresh berries work wonderfully as a topping. A few raspberries or sliced strawberries add tartness that balances the cake’s sweetness. Just remember to count the carbs if you’re tracking strictly.
Sometimes I make a quick keto frosting by mixing cream cheese with a bit of sweetener and vanilla. Spread it on top of the cooled cake for a more decadent treat. This turns your simple mug cake into something that feels special enough for company.
A cup of black coffee or unsweetened tea pairs perfectly with this cake. The slight bitterness of coffee complements the sweetness beautifully. I often make this as an afternoon pick-me-up with my daily coffee.
Storage and Make-Ahead Tips
Keeping it fresh: This mug cake tastes best immediately after cooking, but leftovers can be stored. Transfer the cooled cake to an airtight container and refrigerate for up to two days. The texture becomes slightly denser but remains delicious.
Prep for later: Mix all dry ingredients in a small container or zip-top bag. When you want cake, just add the wet ingredients and cook. This shortcut makes the recipe even faster when cravings hit.
Reheating method: Cold mug cake can be enjoyed as-is or gently reheated. Microwave for 10-15 seconds only – any longer and it dries out. Room temperature cake often tastes better than reheated, so I usually let it sit out for 10 minutes before eating.
Freezing option: While I don’t usually freeze these since they’re so quick to make fresh, you can freeze the cooked cake. Wrap it tightly in plastic wrap and freeze for up to one month. Thaw overnight in the refrigerator before eating.
SEGMENT 3: Nutrition, Tips & FAQs
Nutritional Information
Here’s what you’re getting in each serving of this keto mug cake:
Estimated Nutrition Per Serving:
- Calories: 220-240
- Protein: 5-6 g
- Fat: 18-20 g
- Carbohydrates: 8-10 g
- Net Carbs: 5-6 g
- Fiber: 3-4 g
Note: Nutrition values are estimates and may vary based on specific brands and substitutions used.
The macros on this cake make it perfect for keto dieters. The high fat content keeps you satisfied, while the low net carbs won’t kick you out of ketosis. The protein from the egg adds nutritional value beyond just being a tasty dessert.
Pro Tips from My Kitchen
Temperature matters: Room temperature ingredients blend more smoothly than cold ones. I take my egg and butter out of the fridge 30 minutes before baking.
Mug selection: Use a mug with straight sides rather than one that tapers. This helps the cake cook more evenly throughout.
Power levels: If your microwave runs hot, try cooking at 80% power for slightly longer. This prevents the edges from overcooking while the center finishes.
Flavor variations: Add a tablespoon of unsweetened cocoa powder for chocolate cake. Cinnamon and nutmeg create a spice cake version. Lemon zest makes it bright and refreshing.
Testing doneness: The top should spring back when gently pressed. A toothpick inserted in the center should come out with just a few moist crumbs, not wet batter.
Frequently Asked Questions
Can I make this recipe without a microwave?
Yes, you can bake it in a preheated oven at 350°F (175°C) for about 12-15 minutes. Use an oven-safe ramekin instead of a mug. The texture will be slightly different but still delicious. I prefer the microwave version for speed and convenience.
Why is my mug cake rubbery or tough?
This usually happens from overcooking or using too much coconut flour. Coconut flour absorbs moisture rapidly, and microwaving too long makes it rubbery. Start with less cooking time and check frequently. Also, measure your coconut flour precisely using the spoon-and-level method.
Can I double this recipe for two servings?
I don’t recommend doubling in one mug because it won’t cook evenly. Instead, make two separate mug cakes in two different mugs. You can cook them one at a time or simultaneously if your microwave is large enough. Each cake only takes a couple minutes anyway.
What if I don’t have Joy Filled Eats sweetener?
Any granulated keto-friendly sweetener works perfectly. Erythritol, monk fruit sweetener, or allulose are all great substitutions. Use the same amount as listed in the recipe. Some sweeteners are sweeter than others, so adjust to your taste preference after trying it once.
Is this recipe gluten-free and dairy-free friendly?
Yes, this recipe is naturally gluten-free since coconut flour contains no gluten. For dairy-free, substitute the butter with coconut oil and replace sour cream with coconut cream or dairy-free yogurt. The cake will have a more pronounced coconut flavor but tastes equally delicious.
Final Thoughts
This keto coconut flour mug cake has become my reliable dessert solution. When I want something sweet without spending hours in the kitchen, this recipe delivers every single time. The simple ingredient list means I can make it whenever cravings strike.
I love how versatile this basic recipe is. Some days I eat it plain, other days I experiment with different toppings and flavor combinations. Each version satisfies my sweet tooth while keeping me on track with my keto goals.
The best part is how this recipe proves that keto desserts don’t have to be complicated or taste like cardboard. With just a few quality ingredients and a couple minutes, you can enjoy real cake texture and flavor. No more feeling deprived or missing out on dessert.
I hope you love this mug cake as much as I do. It’s become such a staple in my kitchen that I make it almost automatically now. Give it a try tonight – you’re only minutes away from warm, fluffy, keto-friendly cake happiness.
Keto Coconut Flour Mug Cake
Ingredients
- 1 tablespoon softened butter
- 2 tablespoons coconut flour
- 1 tablespoon sour cream
- 1 large egg
- 1½ tablespoons Joy Filled Eats sweetener or erythritol, monk fruit sweetener, or allulose
- 1 teaspoon vanilla essence
- ¼ teaspoon baking powder
Instructions
- Prepare Your Mug: Choose a microwave-safe mug that holds at least 12 ounces. Lightly grease the inside with butter or coconut oil to prevent sticking.
- Mix Wet Ingredients: Add the softened butter, sour cream, egg, sweetener, and vanilla essence to your mug. Use a fork to whisk everything together vigorously for about 30 seconds until completely smooth with no egg streaks visible.
- Add Dry Ingredients: Sprinkle the coconut flour and baking powder over the wet mixture. Whisk again with your fork until no lumps remain. The batter should be thick but pourable, similar to pancake batter consistency.
- Microwave: Place your mug in the center of the microwave. Cook on high power for 60 seconds first. Check the center – it should be set but still slightly moist on top. If needed, microwave for an additional 15-30 seconds.
- Cool and Enjoy: Let the mug cake cool for 1-2 minutes before eating. The center will continue cooking slightly during this time. Eat it straight from the mug or turn it out onto a plate.
Notes
Sour cream: Use full-fat Greek yogurt, cream cheese, or heavy cream
Butter: Coconut oil or ghee work well (keep at room temperature)
Sweetener: Any keto-friendly granulated sweetener (erythritol, monk fruit, allulose) Storage: Best enjoyed immediately
Store leftovers in airtight container in refrigerator for up to 2 days
Reheat for 10-15 seconds in microwave if desired Tips: Measure coconut flour using spoon-and-level method (don’t pack)
Use room temperature ingredients for best results
Don’t overcook – start with less time and add more if needed
Microwave power varies – adjust timing as needed