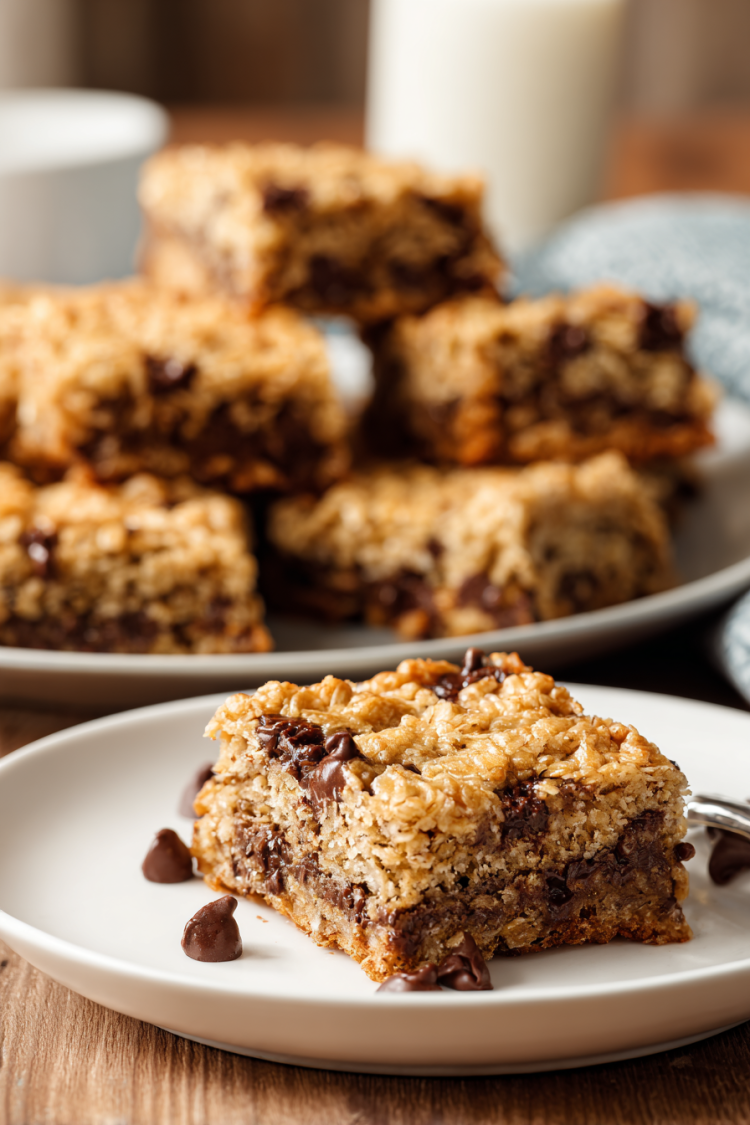
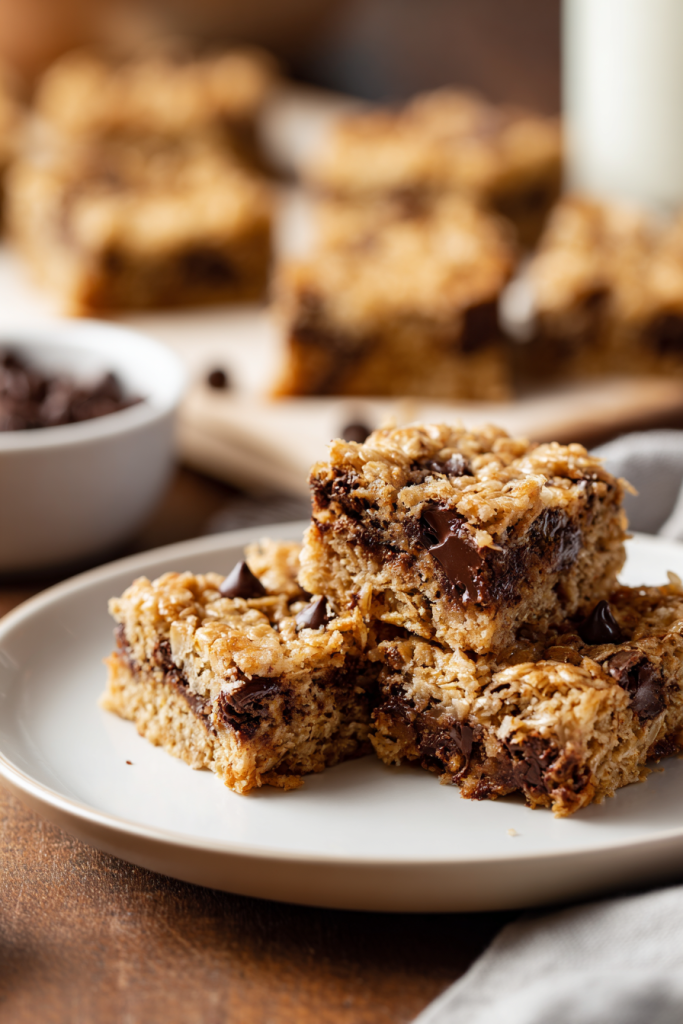
These Oatmeal Chocolate Chip Bars with Browned Butter are loaded with wholesome oats and a double dose of chocolate chips. The secret ingredient is browned butter, which adds incredible depth and nutty richness. Perfect for potlucks, picnics, BBQs, or any gathering where you want to impress.

About These Bars
I’ve always loved oatmeal chocolate chip cookies, but let’s be honest—rolling individual cookies can be time-consuming. These bars deliver all that chewy, chocolatey goodness without the fuss. The texture is perfectly balanced between soft and sturdy, making them ideal for sharing.
What sets these bars apart is the browned butter. When you melt butter until it turns golden and develops a nutty aroma, magic happens. This simple step transforms ordinary bars into something extraordinary. The caramelized notes complement both the hearty oats and sweet chocolate chips beautifully.
I first made these bars for a neighborhood potluck last summer. They disappeared within minutes, and I’ve been making them regularly ever since. The combination of milk chocolate chips and semi-sweet chocolate chips creates the perfect sweetness level.
Why You’ll Love This Recipe
Simple Preparation: These bars come together in one bowl with minimal effort. There’s no creaming butter and sugar, no complicated techniques, and no chilling required. Just melt your butter, mix everything together, and bake. This straightforward approach makes them perfect for beginner bakers.
Rich Browned Butter Flavor: The browned butter adds a depth that regular melted butter simply can’t match. It brings a toasted, almost caramel-like quality that elevates every bite. Once you try browned butter in baked goods, you’ll want to use it everywhere.
Perfect Texture: The oats provide wonderful chewiness while the flour gives structure. The chocolate chips melt slightly during baking, creating pockets of gooey chocolate throughout. Each bar has that satisfying bite that keeps you reaching for another piece.
Crowd-Pleasing Appeal: Whether you’re feeding kids, adults, or picky eaters, these bars win everyone over. They’re familiar enough to be comforting yet special enough to feel like a treat. Plus, they transport beautifully without falling apart.
Customizable Base: While I recommend trying this recipe as written first, you can easily adapt it. Swap chocolate chips for butterscotch, add chopped nuts, or include dried fruit. The sturdy oat base handles variations wonderfully.
Prep Time: 10 minutes | Cook Time: 15 minutes | Total Time: 25 minutes
Servings: 4 | Difficulty: Easy
Ingredients & Instructions
Ingredients Table
| Ingredient | Quantity | Notes |
|---|---|---|
| Old fashioned oats | 2 1/2 cups | Not quick oats or instant |
| All-purpose flour | 2 cups | Spoon and level for accuracy |
| Brown sugar | 1 1/2 cups | Packed measurement |
| Baking soda | 1 tsp | Fresh for best rise |
| Salt | 1 tsp | Enhances all flavors |
| Vanilla extract | 1 Tbsp | Pure vanilla recommended |
| Eggs | 2 large | Room temperature works best |
| Butter | 1 1/4 cups | Will be browned before using |
| Milk chocolate chips | 2 cups | Quality matters here |
| Semi-sweet chocolate chips | 1/2 cup | Balances sweetness |
Instructions
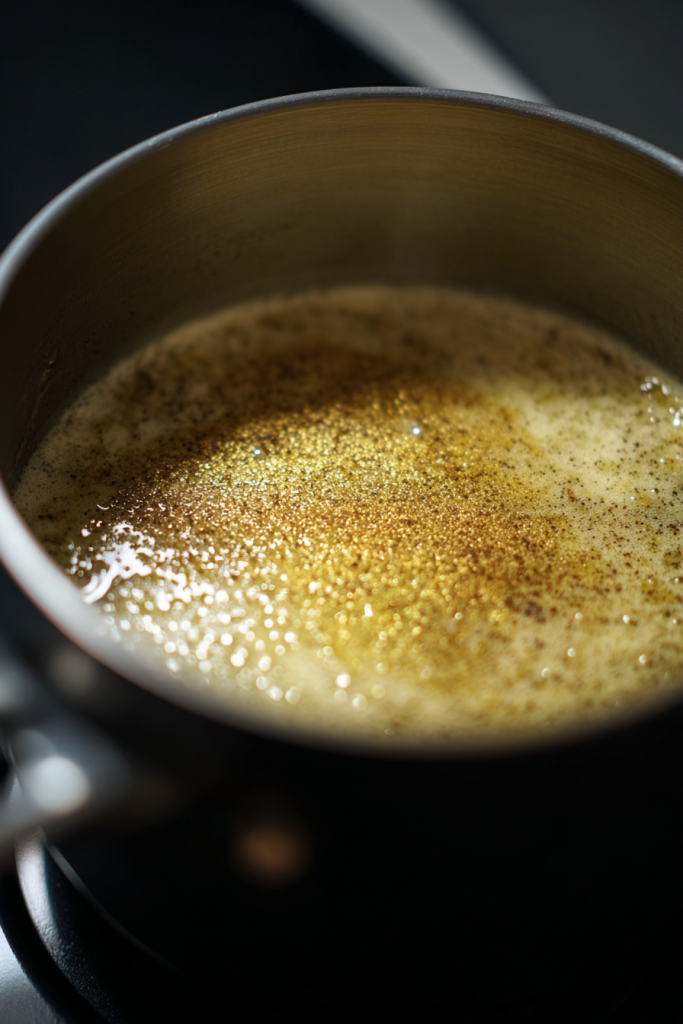
Step 1: Brown the Butter
Place butter in a light-colored saucepan over medium heat. Stir occasionally as it melts and begins to foam. Watch carefully as the butter turns golden brown with fragrant brown bits at the bottom. This takes about 5-7 minutes. Remove from heat immediately and let cool for 10 minutes.
Pro tip: Use a light-colored pan so you can see the butter browning. Dark pans make it difficult to judge the color.
Step 2: Prepare the Pan
Preheat your oven to 350°F (175°C). Line a 9×13-inch baking pan with parchment paper, leaving overhang on the sides. This makes removing the bars incredibly easy once they’ve cooled.
Step 3: Mix Dry Ingredients
In a large bowl, combine oats, flour, brown sugar, baking soda, and salt. Whisk these ingredients together until evenly distributed. Breaking up any brown sugar clumps ensures even sweetness throughout.
Step 4: Add Wet Ingredients
Pour the cooled browned butter into the dry ingredients. Add vanilla extract and eggs. Stir everything together until just combined and no dry streaks remain. The mixture will be thick and slightly sticky.
Pro tip: Don’t overmix once you add the wet ingredients. Stirring too much can make the bars tough.
Step 5: Fold in Chocolate Chips
Add both milk chocolate chips and semi-sweet chocolate chips to the batter. Fold them in gently with a spatula, distributing the chips evenly throughout. Reserve a handful of chips to sprinkle on top if desired.
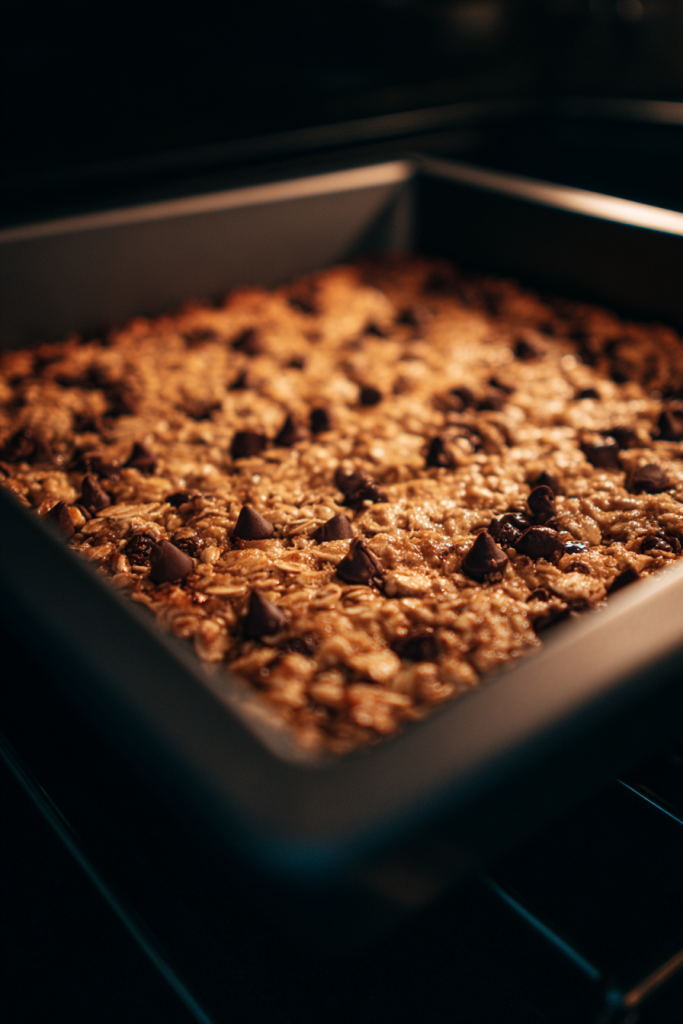
Step 6: Bake
Spread the mixture evenly in your prepared pan, pressing it down firmly with the back of a spoon. Bake for 15 minutes, or until the edges are golden and the center looks set. Don’t overbake—they’ll continue cooking slightly as they cool.
Step 7: Cool and Cut
Let the bars cool completely in the pan, about 1 hour. Use the parchment overhang to lift them out. Cut into squares using a sharp knife, wiping the blade between cuts for clean edges.
Tips for Perfect Bars
Temperature Matters: Make sure your browned butter cools adequately before adding it to the mixture. Hot butter can cook the eggs prematurely, affecting texture.
Press Firmly: When spreading the mixture in the pan, press it down well. This ensures the bars hold together nicely when cut.
Storage: Keep bars in an airtight container at room temperature for up to 5 days. They also freeze beautifully for up to 3 months.
Variations & FAQ
Delicious Variations to Try
Nutty Addition: Stir in 1 cup of chopped pecans or walnuts with the chocolate chips. The nuts add wonderful crunch and complement the browned butter flavor perfectly.
White Chocolate Version: Replace half the chocolate chips with white chocolate chips for a sweeter, creamier variation. The contrast between chocolates looks beautiful too.
Peanut Butter Swirl: Drop spoonfuls of peanut butter on top before baking and swirl with a knife. The combination of peanut butter, oats, and chocolate is unbeatable.
Dried Fruit Mix: Add 1/2 cup of dried cranberries or cherries for a fruity twist. This works especially well during the holiday season.
Serving Suggestions
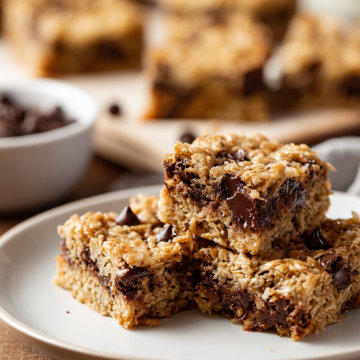
I love serving these bars slightly warm with a scoop of vanilla ice cream. The warmth melts the ice cream slightly, creating a delightful contrast. They’re also perfect alongside a cold glass of milk or hot coffee.
For parties, cut them into smaller squares for bite-sized portions. Dust with powdered sugar for an elegant presentation, or drizzle with melted chocolate for extra decadence.
Why Browned Butter Makes a Difference
Browned butter isn’t just melted butter—it’s a flavor transformation. When butter solids caramelize, they develop complex, nutty notes that enhance baked goods dramatically. In these bars, the browned butter adds depth that makes people ask, “What’s your secret ingredient?”
The process requires attention but isn’t difficult. Watch for the color change and trust your nose. When the butter smells nutty and toasted, it’s ready. This technique works beautifully in cookies, cakes, and frostings too.
Frequently Asked Questions
Can I use quick oats instead of old fashioned oats?
I don’t recommend quick oats for this recipe. Old fashioned oats provide better texture and structure. Quick oats absorb more moisture and can make the bars mushy rather than chewy.
Can I make these bars without browning the butter?
Yes, you can use regular melted butter if you’re short on time. The bars will still be delicious, but you’ll miss the distinctive nutty flavor that browned butter provides. It’s worth the extra 10 minutes when you can manage it.
How do I know when the butter is properly browned?
Watch for a deep golden color and brown specks at the bottom of the pan. The butter will smell nutty and toasted. If it starts smelling burnt or turns dark brown, you’ve gone too far.
Can I double this recipe?
Absolutely! Use two 9×13-inch pans or one large sheet pan. Baking time may increase slightly for a larger pan. Check for doneness by looking for set centers and golden edges.
Why are my bars crumbly?
Crumbly bars usually result from underbaking or not pressing the mixture firmly into the pan. Make sure to bake until set and press the mixture down well before baking.
Final Thoughts
These Oatmeal Chocolate Chip Bars with Browned Butter have become my go-to dessert for any occasion. They’re simple enough for weeknight treats yet impressive enough for gatherings. The combination of hearty oats, rich chocolate, and nutty browned butter creates something truly special.
What I love most is how forgiving this recipe is. Even if your browned butter isn’t perfect or you overbake slightly, the bars still turn out wonderfully. They’re a testament to how simple ingredients, when combined thoughtfully, create memorable desserts.
Give this recipe a try and experience the magic of browned butter for yourself. I’m confident these bars will become a favorite in your kitchen too.
Oatmeal Chocolate Chip Bars with Browned Butter
Ingredients
- 2 1/2 cups old fashioned oats
- 2 cups all-purpose flour
- 1 1/2 cups brown sugar packed
- 1 tsp baking soda
- 1 tsp salt
- 1 Tbsp vanilla extract
- 2 large eggs
- 1 1/4 cups butter for browning
- 2 cups milk chocolate chips
- 1/2 cup semi-sweet chocolate chips
Instructions
- Brown the Butter:
- Place butter in a light-colored saucepan over medium heat. Stir occasionally as it melts and foams.
- Watch carefully as butter turns golden brown with fragrant brown bits at the bottom (5-7 minutes).
- Remove from heat immediately and let cool for 10 minutes.
- Prepare and Mix:
- Preheat oven to 350°F (175°C). Line a 9×13-inch baking pan with parchment paper, leaving overhang on sides.
- In a large bowl, combine oats, flour, brown sugar, baking soda, and salt. Whisk until evenly distributed.
- Pour cooled browned butter into dry ingredients. Add vanilla extract and eggs. Stir until just combined.
- Fold in milk chocolate chips and semi-sweet chocolate chips until evenly distributed.
- Bake:
- Spread mixture evenly in prepared pan, pressing down firmly with back of a spoon.
- Bake for 15 minutes, or until edges are golden and center looks set.
- Let bars cool completely in pan (about 1 hour). Use parchment overhang to lift out and cut into squares.
Notes
Don’t overmix once wet ingredients are added. Stirring too much can make bars tough.
Press mixture firmly into pan to ensure bars hold together when cut.
Wipe knife blade between cuts for clean edges. Storage: Room temperature: Store in airtight container for up to 5 days
Freezer: Freeze for up to 3 months Variations: Add 1 cup chopped pecans or walnuts with chocolate chips
Replace half the chocolate chips with white chocolate chips
Swirl peanut butter on top before baking
Add 1/2 cup dried cranberries or cherries Make Ahead: Bars can be made 1-2 days in advance and stored at room temperature