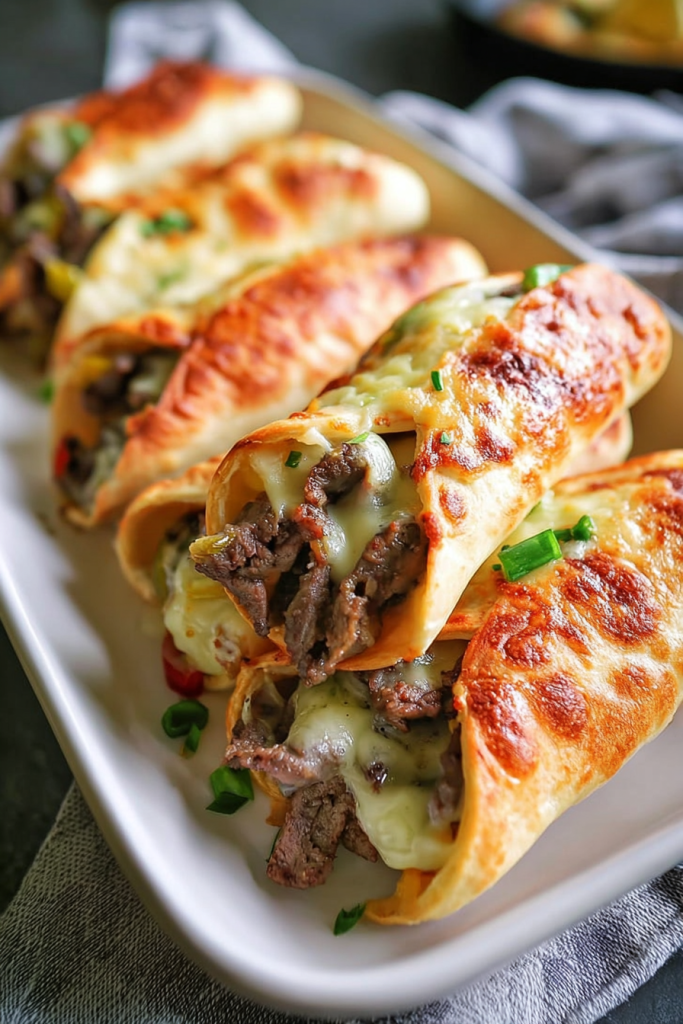
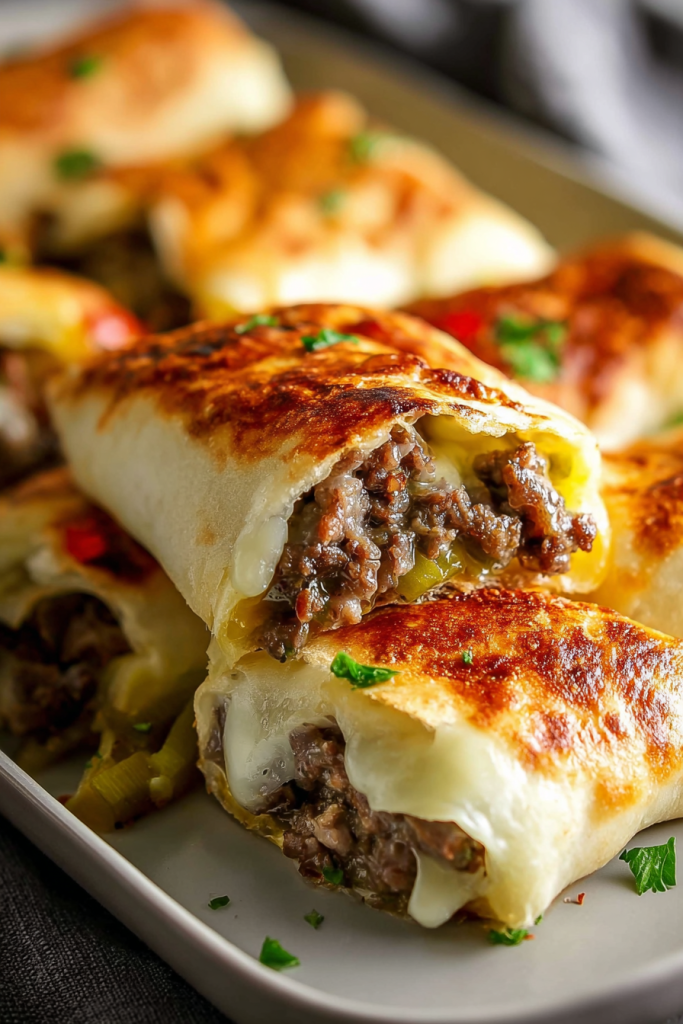
Ever wondered how to enjoy the classic Philly cheesesteak flavors while maintaining your keto lifestyle? 🤔 I’ve been perfecting these Keto Philly Cheesesteak Rolls for months, and they deliver all the savory, cheesy goodness of the traditional sandwich without the carbs! After countless kitchen experiments, I finally cracked the code for roll-ups that actually hold together and taste incredible.
Why You’ll Fall in Love With This Recipe ❤️
Low-Carb Comfort Food 🧀
These roll-ups satisfy your deepest cravings for comfort food while keeping carbs to just 3g per serving. I remember the first time I made these—I couldn’t believe something so delicious could fit my keto macros perfectly!
Quick & Versatile 🕒
From prep to plate in just 25 minutes, with endless customization options. I’ve made these with different cheeses, added mushrooms, and even swapped the beef for chicken—they work every time.
Make-Ahead Friendly 🗓️
Perfect for meal prep warriors like myself. These rolls store beautifully and reheat exceptionally well for busy weeknight dinners. I often make a double batch on Sundays!
Serving Size & Portions 🍽️
This recipe makes 8 Keto Philly Cheesesteak Rolls, with each roll counting as one serving. The beauty of this recipe is how easily it scales—I’ve doubled it for family gatherings and halved it for a cozy dinner for two.
Pro tip: If you’re particularly hungry or serving as a main course, plan for 2-3 rolls per person. For appetizers or alongside a salad, one roll per person works perfectly.
Complete Ingredients List 🛒
| Ingredient | Quantity | Notes |
|---|---|---|
| Monterey Jack cheese (shredded) | 2 cups | Fresh shredded works best for melting |
| Ground beef | 16 ounces | 80/20 blend preferred for flavor |
| Medium onion (sliced) | 1/2 | Yellow or white onion both work well |
| Bell pepper (sliced) | 1 | Any color, though red adds sweetness |
| Worcestershire sauce | 1 tsp | Adds authentic Philly flavor depth |
| Cream cheese | 4 ounces | Room temperature for easier mixing |
| Salt and pepper | To taste | Freshly ground pepper recommended |
Recipe Timing ⏰
Prep Time: 10 minutes | Cook Time: 15 minutes | Total Time: 25 minutes
Servings: 4 | Difficulty: Easy
Preparation Strategy ⏳
Total prep time: 10 minutes
Active prep time: 8 minutes
I’ve learned that success with these roll-ups comes down to timing and preparation. Here’s my game plan that ensures everything comes together smoothly:
Planning tip: Slice your vegetables and measure ingredients beforehand. I like to have everything ready in small bowls—it makes the actual cooking feel effortless and prevents any rushed moments when the cheese circles are cooling.
Make-ahead strategy: The beef mixture can be prepared up to 2 days in advance and stored in the refrigerator. Just reheat gently before assembling your rolls.
Cooking Timeline ⏲️
Total cooking time: 15-20 minutes
- Cheese circles: 8-10 minutes (watch carefully!)
- Beef mixture: 5-7 minutes
- Assembly time: 3-5 minutes
Pro tip: I start by preheating my oven first, then immediately begin cooking the beef mixture. By the time the beef is ready, my oven is perfectly heated for the cheese circles. This overlap saves precious time and keeps everything warm for assembly.
Complete Cooking Instructions 👩🍳
Step 1: Prepare Your Workspace
Preheat your oven to 350°F (175°C). Line a large baking sheet with parchment paper—this is crucial for preventing sticking and makes cleanup a breeze. I learned this the hard way after my first attempt resulted in cheese permanently fused to my baking sheet!
Step 2: Cook the Perfect Beef Mixture
Heat a large skillet over medium-high heat. Add the ground beef and begin breaking it apart with a sturdy spatula. I prefer using a wooden spoon for this—it gives better control than metal utensils.
Once the beef begins to brown (about 2-3 minutes), add your sliced onions and bell peppers. Cook everything together until the beef is completely browned and the vegetables have softened beautifully—this usually takes 5-7 minutes.
Critical step: Drain excess grease from the pan! This prevents soggy roll-ups and ensures your cheese circles maintain their structural integrity.
Step 3: Season and Add Creaminess
Return the drained skillet to medium heat. Add the Worcestershire sauce, salt, and pepper to the beef mixture, stirring to distribute evenly. The Worcestershire sauce adds that authentic Philly depth that makes all the difference.
Add the cream cheese to the skillet and stir continuously until it’s completely melted and incorporated—about 2 minutes. The mixture should look creamy and cohesive. Remove from heat and set aside.
Pro tip: If your cream cheese is straight from the fridge, cut it into smaller pieces for faster melting.
Step 4: Create Perfect Cheese Circles
On your parchment-lined baking sheet, create 8 evenly spaced circles using the shredded Monterey Jack cheese. Use about 1/4 cup per circle, spreading it into roughly 4-inch circles.
Spacing tip: Leave at least 2 inches between each circle—the cheese will spread during baking, and you don’t want them merging together like I experienced in my early attempts!
Place the baking sheet in your preheated oven and bake for 8-10 minutes. You’re looking for golden brown edges and a beautiful lace-like appearance throughout.
Step 5: The Critical Assembly Phase
Remove cheese circles from the oven and let them cool for exactly 1 minute—timing is everything here! They need to be pliable but not scorching hot.
Timing is crucial: Work quickly but carefully. The cheese should still be flexible but cool enough to handle safely.
Place approximately 2 tablespoons of the beef mixture onto each cheese circle, positioning it slightly off-center. Carefully roll or fold the cheese around the filling, creating your roll-up shape.
Allow to cool for 2-3 minutes—this sets the shape as the cheese firms up and holds everything together.
Essential Cooking Tools & Equipment 🛠️
After making these dozens of times, here are the tools that make the biggest difference:
- Non-stick skillet or well-seasoned cast iron pan
- Large baking sheet (18×13 inch works perfectly)
- Parchment paper (never skip this!)
- Measuring cups and spoons
- Wide spatula for flipping and serving
- Tongs (incredibly helpful for handling hot cheese circles)
- Sharp knife and cutting board
Pro tip: I keep a small offset spatula handy for lifting the cheese circles—it gives you better control than regular spatulas.
Flavor Profile & Taste Experience 🌶️
What to Expect
These rolls deliver an incredibly rich, savory flavor with a satisfying combination of perfectly seasoned beef and gooey cheese. The Monterey Jack exterior provides a subtle, nutty backdrop that complements rather than competes with the filling.
Key Flavor Components
- Savory, well-seasoned beef 🥩
- Sweet, caramelized onions 🧅
- Worcestershire umami depth 💧
- Creamy cheese blend 🧀
- Slight pepper heat 🌶️
Balancing Your Flavors
Want to customize the taste? Here’s how I adjust the recipe:
For more tang: Add a splash of apple cider vinegar to the beef mixture For deeper flavor: Include 1/2 teaspoon of garlic powder For brightness: Garnish with 1 tablespoon of fresh chopped parsley For heat: Add a pinch of red pepper flakes to the beef
Allergen Information & Substitutions ⚠️
Primary Allergens Present
These Keto Philly Cheesesteak Rolls contain:
- Dairy (Monterey Jack cheese, cream cheese)
Substitution Options
Dairy-free alternative: Use high-quality dairy-free cheese alternatives that melt well. I’ve had success with Violife and Miyoko’s brands, though the texture will be slightly different.
Worcestershire sauce alternative: Coconut aminos work perfectly for a soy-free and gluten-free option with a similar umami depth.
Complete Nutritional Breakdown 🥗
Per Serving (1 roll):
- Calories: 245 kcal
- Protein: 18g
- Total Fat: 18g (9g saturated, 7g unsaturated, 0g trans)
- Carbohydrates: 4g
- Fiber: 1g
- Net Carbs: 3g
- Sugar: 2g
- Sodium: 420mg
- Cholesterol: 65mg
Macronutrient ratio: 66% fat, 29% protein, 5% carbs—absolutely perfect for keto requirements!
Dietary Compatibility 🥑
Perfect For:
✅ Keto-friendly (3g net carbs) ✅ Low-carb lifestyle ✅ Gluten-free ✅ Sugar-free ✅ LCHF (Low Carb High Fat)
Not Suitable For:
❌ Dairy-free (unless using substitutions) ❌ Vegan ❌ Vegetarian
Dietary Modifications
Paleo adaptation: Use grass-fed beef and ensure your Worcestershire sauce is paleo-compliant Higher protein version: Use 93/7 lean ground beef and add an extra ounce of cream cheese Lower calorie option: Use 90/10 ground beef and light cream cheese
Recipe Variations & Customizations 🔄
Meat Alternatives
Traditional Philly style: Substitute ground beef with thinly sliced ribeye or sirloin steak for authentic texture and flavor Convenience option: Use high-quality deli roast beef, chopped and warmed through Poultry alternative: Ground chicken or turkey works wonderfully—just add 1 teaspoon olive oil to prevent sticking
Cheese Variations
Classic Philly approach: Use provolone instead of Monterey Jack for traditional flavor Extra stretchy: Mozzarella creates incredible meltability and mild taste Bold flavor: Try aged white cheddar for more pronounced taste
Vegetable Additions
Mushroom lover’s version: Add 1 cup sliced mushrooms to the beef mixture Spicy kick: Include sliced jalapeños or red pepper flakes Extra nutrition: Add diced zucchini for more vegetables with minimal carb impact
Perfect Pairings & Side Dishes 🍷
Recommended Keto-Friendly Sides
After serving these rolls countless times, I’ve discovered the perfect complementary dishes:
Cauliflower rice seasoned with butter, garlic, and fresh herbs creates a fantastic base that soaks up any delicious juices 🍚
Zucchini noodles tossed in olive oil with garlic and parmesan add a fresh, light contrast 🥒
Simple arugula salad with lemon vinaigrette cuts through the richness beautifully 🥗
Roasted broccoli with parmesan provides satisfying crunch and extra nutrients 🥦
Beverage Pairings
Non-alcoholic options: Sparkling water with lime, unsweetened iced tea with lemon, or sugar-free flavored seltzers
Alcoholic options: Dry red wine (Cabernet Sauvignon works beautifully), light beer (check carb content), or whiskey neat
Complete Meal Suggestions
Hearty dinner: Serve 2-3 roll-ups with cauliflower mash and steamed asparagus for a completely satisfying meal
Light lunch: Pair 1-2 roll-ups with a mixed green salad for perfect midday fuel
Party appetizers: Cut rolls in half diagonally and serve with toothpicks alongside other keto appetizers
Elegant Serving Suggestions 🍽️
Presentation Ideas
Restaurant-style plating: Slice roll-ups diagonally and fan them on individual plates with a small side salad
Family-style serving: Arrange whole roll-ups on a large wooden board with complementary sides
Casual entertaining: Place on a platter with colorful toothpicks and small bowls of hot sauce or ranch for dipping
Garnishing Tips
Fresh herb finish: Sprinkle with chopped parsley, chives, or oregano just before serving
Color and flavor boost: Light dusting of paprika or a drizzle of sugar-free hot sauce
Texture contrast: Crushed pork rinds or toasted almond slivers add delightful crunch
Storage & Shelf Life Solutions ❄️
Short-Term Storage
Refrigeration: Store leftovers in airtight containers for up to 4 days. I use glass containers which don’t retain odors and stack nicely.
Long-Term Storage
Freezing method: These roll-ups freeze beautifully for up to 3 months! Here’s my proven technique:
- Cool rolls completely to room temperature
- Place on a baking sheet in single layer
- Freeze for 2 hours until solid
- Transfer to freezer-safe bags or containers
- Label with date and contents
Reheating Instructions
From refrigerated: Microwave for 30-45 seconds, or better yet, reheat in a skillet over medium heat for 2-3 minutes
From frozen: Thaw overnight in refrigerator, then reheat in a 350°F oven for 8-10 minutes
Pro tip: To maintain that delicious crispy exterior, avoid microwaving frozen rolls. The oven method preserves texture beautifully.
Essential Cooking Tips & Troubleshooting 🔥
Techniques for Consistent Success
Perfect cheese texture: Watch those cheese circles like a hawk! They should be golden at the edges but still pliable—not burned and brittle.
Even filling distribution: I use a small cookie scoop for perfectly consistent portions in each roll.
Optimal rolling temperature: Let cheese circles cool exactly 45-60 seconds. Too hot and they tear, too cool and they crack.
Time-Saving Strategies
Prep-ahead approach: Cook the beef mixture up to 2 days in advance and store refrigerated
Efficient assembly line: Prepare all cheese circles first, then add filling to all at once for faster assembly
Batch cooking wisdom: Double the recipe and freeze half—future you will be grateful!
When Things Go Wrong 🤔
Problem: Cheese circles are too crispy and crack when rolling
Solution: Remove from oven 1-2 minutes earlier next time. They continue cooking slightly on the hot pan.
Problem: Filling leaks out during rolling
Solution: Use less filling per roll (about 1.5 tablespoons instead of 2) and ensure cheese has cooled adequately.
Problem: Cheese doesn’t develop lacy texture
Solution: Check that your oven is fully preheated and cheese is spread evenly. Some ovens run cool.
Problem: Final rolls are too greasy
Solution: Drain beef mixture more thoroughly and consider using leaner ground beef (90/10 instead of 80/20).
Alternative Preparation Methods 🔄
Fathead Dough Variation
For those wanting a more bread-like wrapper, try this alternative:
Ingredients:
- 1½ cups mozzarella cheese (shredded)
- 2 oz cream cheese
- 1 large egg
- ¾ cup almond flour
- ½ tsp baking powder
- ¼ tsp salt
Method:
- Melt cheeses together in microwave, stirring every 30 seconds
- Mix in egg, then dry ingredients
- Form into thin circles on parchment
- Bake at 400°F for 12-15 minutes
- Add filling and roll as with cheese-only version
Air Fryer Method
Temperature: 350°F
Time: 6-8 minutes for cheese circles
Tip: Work in batches and watch carefully—air fryers can brown quickly!
Frequently Asked Questions ❓
Can these be made completely in advance?
Absolutely! These roll-ups are meal prep champions. I often make them on Sunday for the entire week. They store beautifully in the refrigerator for up to 4 days and freeze for up to 3 months. The key is cooling them completely before storage and reheating gently to maintain texture.
Will any type of cheese work for the wraps?
While most hard cheeses will work, those with higher fat content like Monterey Jack, sharp cheddar, or provolone melt and set best. I’ve experimented with many varieties, and low-fat cheeses tend to become too brittle when cooled. Stick with full-fat options for best results.
Can I use sliced steak instead of ground beef?
Yes, and it’s absolutely delicious! Thinly sliced ribeye or sirloin steak creates a more traditional Philly cheesesteak experience. Cook the sliced steak quickly over high heat until just done, then combine with the sautéed vegetables. The texture is incredible and very authentic.
How can I make these dairy-free?
While the traditional version relies on dairy, you can substitute with high-quality dairy-free cheese alternatives. I’ve had the best success with Violife and Miyoko’s brands for both the wraps and cream cheese component. The texture will be slightly different, but the flavor is still satisfying.
Are these suitable for meal prep?
These are among my favorite meal prep recipes! They reheat exceptionally well and actually improve in flavor overnight as the seasonings meld. Cool completely before storing, and they’ll maintain their shape and taste for days. I recommend reheating in the oven rather than microwave for best texture.
Can I double or triple the recipe?
Absolutely! This recipe scales beautifully. I often triple it for family gatherings or when I want to stock my freezer. Just make sure you have enough baking sheet space for all the cheese circles, or work in batches.
Final Thoughts & Recipe Success ❤️
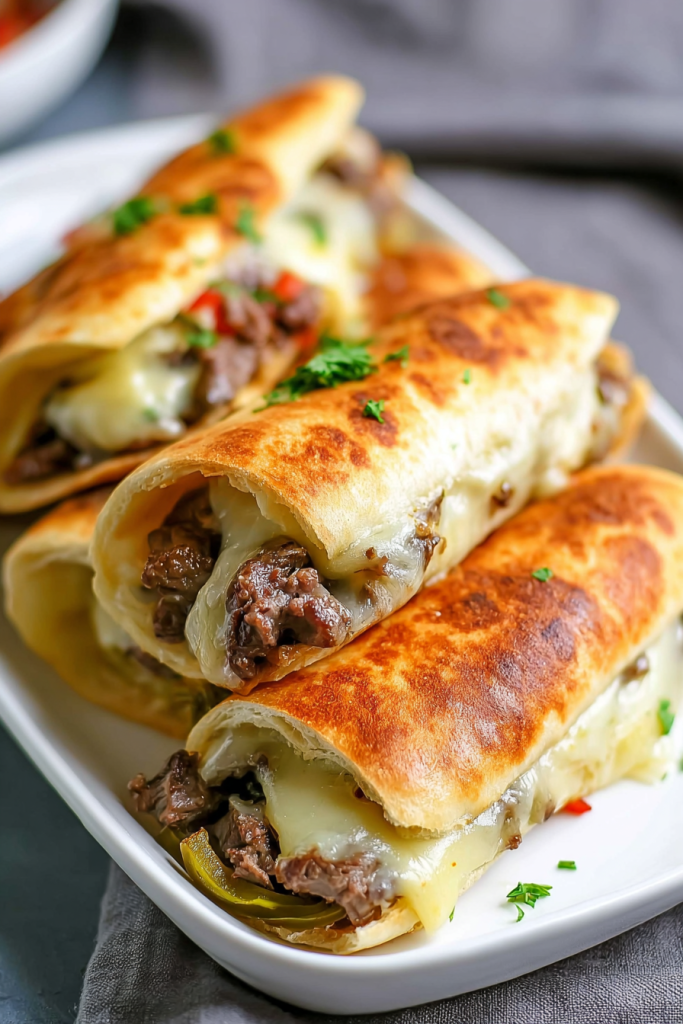
These Keto Philly Cheesesteak Rolls have become my go-to comfort food when I’m craving something indulgent but want to stay on track with my keto lifestyle. The combination of savory beef, caramelized vegetables, and that perfect cheese wrapper creates something truly special—a dish that satisfies both physically and emotionally.
What I love most about this recipe is its incredible versatility. I’ve made versions with different cheeses, various vegetables, and even different proteins, and it works beautifully every time. The technique, once mastered, opens up endless possibilities for creative keto cooking.
Whether you’re new to keto cooking or a seasoned pro looking for a reliable crowd-pleaser, these roll-ups deliver consistently delicious results. The first time I served them to non-keto friends, they couldn’t believe something so satisfying could be low-carb!
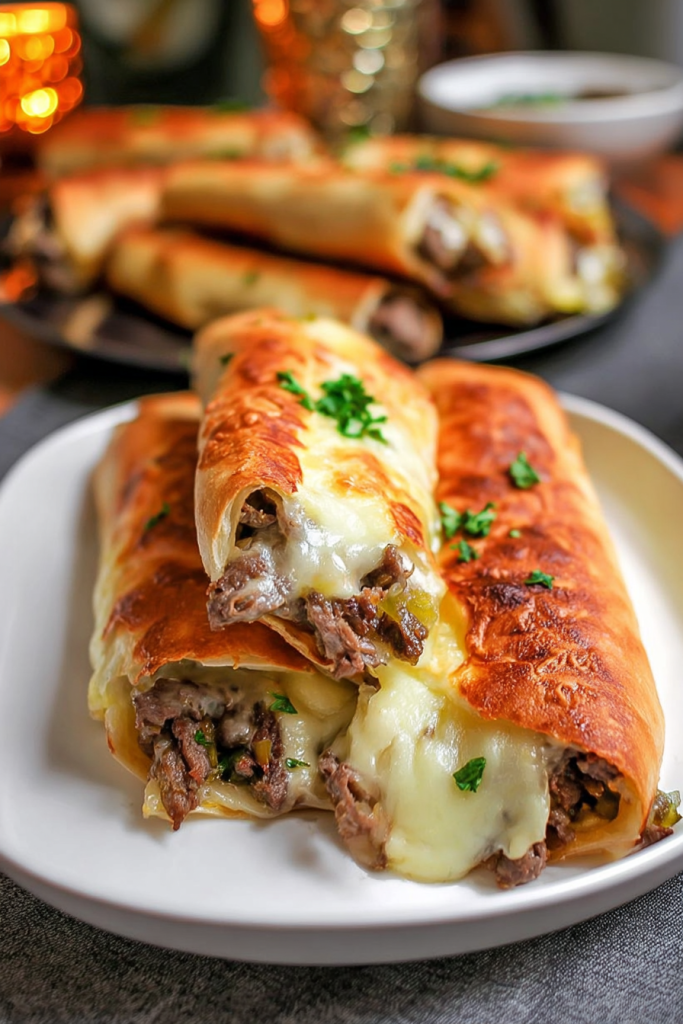
Give these Keto Philly Cheesesteak Rolls a try, and I’m confident they’ll earn a permanent spot in your recipe rotation. They’re proof that eating keto doesn’t mean sacrificing the foods you love—sometimes it means discovering even better versions! 🧀🥩❤️
Happy cooking, and enjoy every delicious, guilt-free bite!

Keto Philly Cheesesteak Rolls
Ingredients
- 2 cups Monterey Jack cheese shredded, fresh preferred
- 16 ounces ground beef 80/20 blend recommended
- ½ medium onion sliced
- 1 bell pepper sliced, any color
- 1 tsp Worcestershire sauce
- 4 ounces cream cheese room temperature
- Salt and freshly ground pepper to taste
Instructions
- Preheat oven to 350°F (175°C).
- Line a large baking sheet with parchment paper.
- Cook beef mixture:
- Heat a large skillet over medium-high heat. Add ground beef and break apart with a wooden spoon. Brown for 2-3 minutes.
- Add vegetables:
- Stir in sliced onions and bell peppers. Cook until beef is fully browned and vegetables soften (5-7 minutes). Drain excess grease.
- Season and add cream cheese:
- Return skillet to medium heat. Add Worcestershire sauce, salt, and pepper. Stir well. Add cream cheese and stir until fully melted and creamy (~2 minutes). Remove from heat.
- Create cheese circles:
- On the parchment-lined baking sheet, place 8 circles of shredded Monterey Jack (about ¼ cup each), spaced 2 inches apart. Flatten to ~4-inch diameter.
- Bake cheese circles:
- Bake for 8-10 minutes until edges are golden and lace-like.
- Assemble rolls:
- Remove cheese circles and cool exactly 1 minute until pliable. Quickly place ~2 tablespoons of beef mixture slightly off-center on each circle.
- Roll up:
- Carefully roll cheese around filling to form rolls. Let cool 2-3 minutes to set.