My Favorite Cold Weather Comfort Food
You know that feeling when winter hits and all you want is something warm and hearty?
That’s exactly how I felt last January when I started craving beef stew. But here’s the thing… I’m doing keto. And traditional beef stew? Loaded with potatoes and thickened with flour.
Not exactly keto-friendly.
So I started experimenting in my kitchen. Trial and error. Some batches were too thin. Others had vegetables that turned to mush. My family was starting to wonder what I was doing.
But then… I nailed it.
This recipe right here? It’s become our family’s weekend staple. My teenagers actually request it. And trust me, getting teens to ask for anything healthy is basically a miracle.
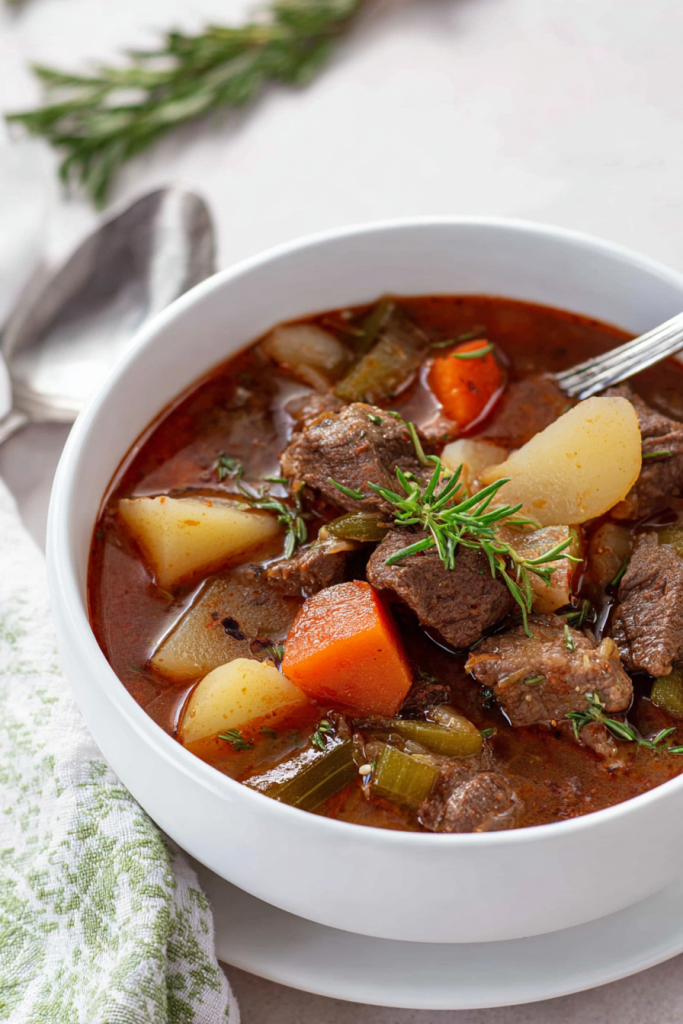
The beef chunks are so tender they practically dissolve on your fork. The broth is rich and thick without any flour or cornstarch. And the smell while it’s cooking?
Your house will smell incredible.

Why This Recipe Works
Here’s what makes this stew different from other keto versions I’ve tried.
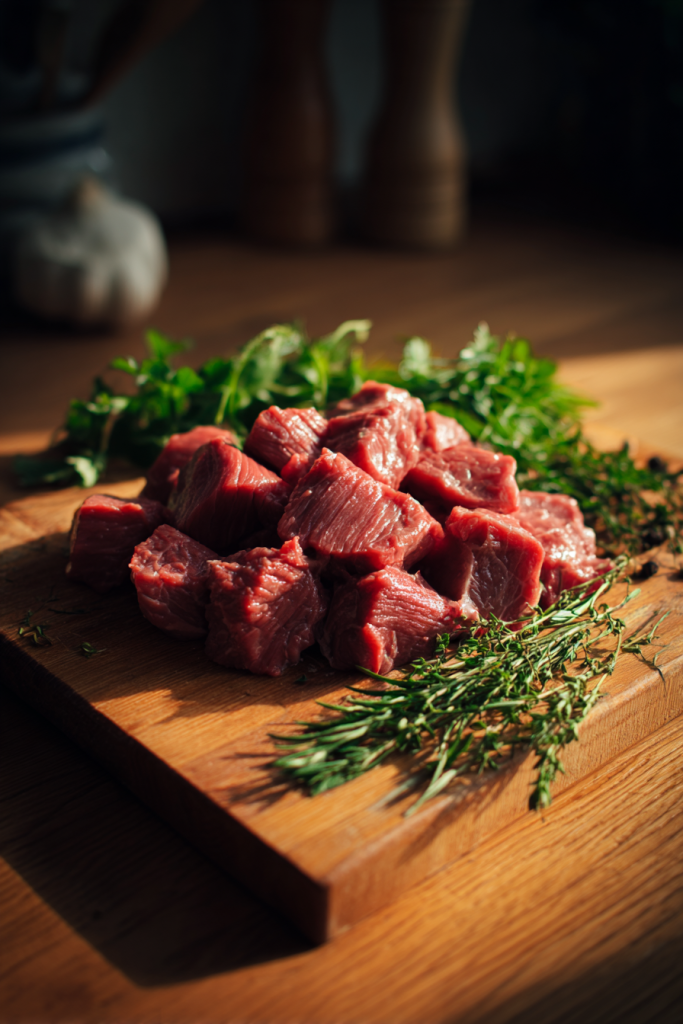
First, the beef. When you brown it properly (more on that later), you get these beautiful caramelized edges. That’s where the flavor lives.
Second, the vegetables. I use turnips instead of potatoes. Sounds weird, right? But they hold up during long cooking and have that same satisfying bite. Zucchini soaks up all the savory broth. And a tiny bit of carrot adds color without breaking your carb budget.
Third, the thickness. Most keto stews are either too soupy or use questionable thickeners. I use glucomannan. Just half a teaspoon. It creates that velvety, stick-to-your-ribs consistency without adding any carbs.
The result?
A stew that tastes exactly like the one my mom used to make. Except this one keeps me in ketosis.
The Numbers That Matter
Let me break down why this recipe is a winner:
- 28 grams of protein per serving (hello, muscle maintenance!)
- Only 4.5g net carbs (that’s less than most “keto” snacks)
- 340 calories that actually fill you up
- Makes 6 generous servings (perfect for meal prep)
I meal prep this every other Sunday. By Wednesday, it tastes even better. The flavors have had time to get to know each other. And I’m not stuck cooking every single night.
Win-win.
What You’ll Love About This Stew
The texture. Each bite has something interesting going on. Buttery soft beef. Tender turnips that still have a little bite. Zucchini that melts in your mouth.
The versatility. I’ve made this in my Dutch oven, slow cooker, and Instant Pot. All three methods work beautifully. Choose whatever fits your schedule.
The make-ahead factor. Honestly? Day two tastes better than day one. The flavors meld together overnight. So you can make this on Sunday and have an even better dinner on Monday.
The family approval rating. My husband, who’s not even doing keto, loves this stew. He has no idea it’s “diet food.” That’s the best compliment I could ask for.
Plus, here’s a secret…
You can serve it over cauliflower mash if you want it extra hearty. Or just eat it straight from the bowl. Both ways are delicious.
How I Usually Make It
I’m a Dutch oven person myself. There’s something satisfying about browning the meat on the stovetop, then sliding the whole pot into the oven.
Set it. Forget it. Come back to tender, fall-apart beef.
But you don’t need a Dutch oven. A slow cooker works great if you’re heading out for the day. An Instant Pot cuts the cooking time in half if you’re in a hurry.
The basic technique stays the same no matter what:
- Brown the beef (don’t skip this!)
- Sauté the aromatics
- Add liquid and let it work its magic
That’s it. Simple steps that build incredible flavor.
Let’s Talk Ingredients
What You’ll Need
| Ingredient | Quantity | Notes |
| Beef stew meat | 2 lb (907 g) | Chuck roast is your best friend here – cut into 1-inch chunks |
| Salt | To taste | Be generous. Seriously. Under-salted stew is sad stew |
| Black pepper | To taste | Fresh ground makes a difference |
| Avocado oil | 3 tbsp | Olive oil works too – you’ll use it in three parts |
| Onion | 1/2 cup (80 g) | Diced small. Keep it minimal since onions have carbs |
| Celery | 1 stalk | Chopped. Adds that classic stew flavor |
| Fresh rosemary | 2 tbsp | Chopped. Or use thyme if that’s what you have |
| Tomato paste | 1 tbsp | This deepens the flavor and adds richness |
| Garlic | 2 cloves | Fresh minced. Don’t even think about using the jarred stuff |
| Beef broth | 1 cup (240 g) | Go for low-sodium so you control the salt |
| Zucchini | 1 medium | Chopped into bite-size pieces |
| Turnip | 1 small | Cubed. This is your potato replacement |
| Carrot | 1/2 small | Optional. Just for color really |
| Glucomannan | 1/2 tsp | Your secret thickening weapon. Xanthan gum works too |
Prep Time: 15 minutes | Cook Time: 90 minutes | Total Time: 1 hour 45 minutes
Servings: 6 | Difficulty: Medium
About Your Beef
Chuck roast is king here.
Why? It’s got enough fat marbling to stay juicy during long cooking. Plus, all that connective tissue? It breaks down into pure, silky goodness.
I buy a whole chuck roast and cut it myself. Makes it cheaper. And I can control the size of the chunks.
Aim for 1-inch cubes. Not bigger. Not smaller.
Too small and they dry out. Too big and they don’t cook evenly. One inch is the sweet spot.
Pro tip: Pat them dry before seasoning. Wet beef won’t brown properly. It’ll just steam. And steamed beef doesn’t develop that gorgeous caramelized crust we’re after.
The Aromatic Base
This is where the magic starts.
Onion, celery, and garlic. The holy trinity of stew-making.
But here’s the catch with keto… onions have carbs. More than you’d think.
So I only use half a cup. That’s enough to build flavor without spiking your carb count. The celery adds brightness without any carb guilt. And garlic? Well, garlic makes everything better.
Fresh rosemary is non-negotiable for me. Dried rosemary tastes like pine needles. Fresh rosemary tastes like heaven.
But if you only have dried, use it. Just cut the amount to about 2 teaspoons. And add it earlier in the cooking process. Dried herbs need more time to wake up.
The Vegetable Squad
Turnips are doing the heavy lifting here. They replace potatoes beautifully. Same texture. Similar bite. Way fewer carbs.
When I first told my husband I was putting turnips in his stew, he made a face. But he couldn’t tell the difference. Victory.
Zucchini is like a flavor sponge. It soaks up all that rich, beefy broth. Plus it adds bulk without adding carbs. Win-win.
The carrot is optional. I add just a tiny bit for color. Makes the stew look more appealing. But if you’re counting every carb, skip it. The stew tastes amazing either way.
How to Make This Stew (The Right Way)
Step 1: Prep Your Beef
First things first. Pat those beef chunks completely dry with paper towels.
I know it seems fussy. But this step matters.
Wet meat + hot pan = steam. Dry meat + hot pan = beautiful brown crust.
Season every piece generously with salt and pepper. Don’t be shy. The seasoning needs to penetrate the meat.
While you’re doing this, preheat your oven to 325°F.
Step 2: Brown the Beef (Don’t Skip This!)
Heat your Dutch oven over medium-high heat. Add 1 tablespoon of oil. Wait until it shimmers. That’s when you know it’s hot enough.
Here’s where people mess up…
They dump all the beef in at once. The temperature drops. The beef steams instead of browns. And you lose all that flavor potential.
Add only half the beef. Give each piece room to breathe. Let them sit for 2-3 minutes without touching them. Then turn and brown all sides.
You’re looking for a golden-brown crust. Not gray. Not pale. Golden-brown.
Remove to a bowl. Add another tablespoon of oil. Repeat with the remaining beef.
This takes patience. But it’s worth every minute.
Step 3: Build Your Flavor Foundation
Add the last tablespoon of oil to your pot. Toss in the onion and celery.
Sauté for about 4 minutes. You want them soft but not brown.
Then add the rosemary, tomato paste, and garlic. Stir constantly for another minute.
The garlic should smell incredible. The tomato paste should darken slightly. That’s when you know it’s ready.
Step 4: Create the Braising Liquid
Pour in the beef broth. Let it come to a simmer.
Now here’s an important step…
Use a wooden spoon to scrape up all those browned bits stuck to the bottom. Those bits are called fond. And they’re pure flavor gold.
Get every last bit up into your liquid.
Add the beef back to the pot. Include any juices that collected in the bowl. That’s concentrated beef flavor right there.
Step 5: Into the Oven
Cover your Dutch oven with a tight-fitting lid.
Slide it into the preheated oven.
Set a timer for 1 hour.
Now walk away. Seriously. Don’t peek. Every time you lift that lid, heat escapes. And the cooking time gets longer.
During this hour, something magical happens. The tough connective tissue in the beef breaks down. The meat becomes tender. The flavors deepen.
Trust the process.
Step 6: Add the Vegetables
After an hour, carefully remove the pot from the oven.
Add your zucchini, turnip, and carrot (if using). Stir everything together.
Cover it back up. Return to the oven for another 30-45 minutes.
The vegetables should be fork-tender but not mushy. The turnips should hold their shape. That’s what you’re looking for.
Step 7: Thicken It Up
Remove the pot one final time.
Push the meat and vegetables to one side. Sprinkle the glucomannan over the exposed liquid.
Whisk quickly. The stuff clumps if you’re not fast.
The broth will thicken as it sits. Don’t overdo it. You can always add more. But you can’t take it out.
The Tips That Make a Difference
Here’s what I’ve learned from making this stew dozens of times:
Temperature is everything. A hot pan creates that instant sear. A lukewarm pan creates gray, steamed meat. Always preheat properly.
Never crowd the pan. I know you want to save time. But cramming all the beef in at once backfires. Brown in batches. Your taste buds will thank you.
Less broth is more. Many recipes call for way too much liquid. You want stew, not soup. One cup of broth is perfect. The vegetables release moisture as they cook. Trust me on this.
The oven is your friend. Stovetop cooking requires constant babysitting. Up and down with the heat. The oven maintains steady temperature. Set it to 325°F and forget about it.
Other Ways to Make This
Got a Slow Cooker?
You can totally use a slow cooker. But here’s the thing…
Still brown your beef first. I know slow cooker recipes promise you can skip this step. But browning builds flavor that you just can’t replicate.
Brown the beef in a skillet. Transfer to your slow cooker. Add the sautéed aromatics, broth, and seasonings.
Cook on high for 3 hours or low for 6 hours.
Add the vegetables during the last hour. Otherwise they turn to mush.
The gentle, steady heat of a slow cooker makes incredibly tender beef. It’s perfect for those days when you’re out of the house.
Instant Pot Method
Short on time? The Instant Pot is your answer.
Use the Sauté function to brown your beef right in the pot. Work in batches like you would on the stovetop.
Remove the beef. Sauté your aromatics.
Here’s the key difference…
Only use ½ cup of broth instead of a full cup. Pressure cookers pull liquid out of meat and vegetables. Too much liquid makes watery stew.
Cook on the Stew function for 20 minutes. Let the pressure release naturally. This keeps the meat tender.
Add your vegetables. Cook for another 15 minutes.
Total active time? About 45 minutes. Not bad for a stew this good.

Your Questions Answered
Can I use something other than glucomannan?
Absolutely.
Xanthan gum works great. Use even less though. Maybe ¼ teaspoon to start.
Here’s the trick with xanthan gum…
Remove about ½ cup of broth to a separate bowl. Let it cool slightly. Then whisk the xanthan gum into that cooled liquid really fast.
Pour it back into the stew and stir.
This prevents those annoying clumps that happen when xanthan gum hits hot liquid directly.
How long does this keep?
In the fridge? Up to 5 days in an airtight container.
Honestly though? It tastes better on day two. The flavors have time to marry. It’s like the stew goes on a honeymoon overnight.
Want to freeze it? Go ahead. Portion it into meal-sized containers. Freeze for up to 2 months.
Thaw overnight in the fridge. Reheat gently on the stovetop.
Can I add other vegetables?
Sure thing.
Mushrooms are great. They add meatiness and earthy flavor.
Celeriac (celery root) works similar to turnips. Same texture. Slightly different flavor.
Rutabaga is another good potato substitute.
Just keep the proportions similar. Too many vegetables and your stew gets thin.
What if I only have dried herbs?
It’s not ideal. But it works.
Use ⅓ of the amount. So about 2 teaspoons of dried rosemary instead of 2 tablespoons fresh.
Add them earlier in the process. Dried herbs need more time to rehydrate and release their flavor.
Fresh herbs taste brighter and more vibrant. But dried herbs in a pinch? Totally fine.
Is this freezer-friendly?
Yes. Very much so.
Let the stew cool completely first. Never put hot food in the freezer. It raises the temperature and can affect other frozen items.
Use freezer-safe containers with tight lids. Leave about an inch of headspace. The liquid expands when it freezes.
Label with the date. Trust me on this. Three months later you won’t remember when you made it.
Thaw in the fridge overnight. Reheat on the stovetop over medium-low heat.
This is already dairy-free, right?
Yep.
No butter. No cream. No cheese.
The rich, creamy texture comes from natural gelatin. It releases from the beef as it cooks. That’s what makes the broth so velvety.
How to Serve This Stew
The beauty of this stew? It’s a complete meal all by itself.
I usually serve it in wide, shallow bowls. The kind that show off all the beautiful ingredients. Plus shallow bowls cool down faster. Nobody wants to burn their tongue on the first bite.
Want to make it extra hearty?
Cauliflower mash underneath. Game changer. The creamy mash soaks up all that rich broth. It’s like keto pot pie without the crust.
A simple side salad balances everything nicely. Keep it light. Crisp lettuce. Maybe some cucumber. A basic vinaigrette.
The fresh, bright flavors cut through the richness of the stew. Your palate will appreciate the contrast.
Keto bread for dipping? Yes please. Nothing should be left in that bowl. The broth is too good to waste.
Storage Tips That Actually Work
Storing in the Fridge
Let the stew cool to room temperature first. I usually spread it out a bit. Helps it cool faster.
Never put hot food directly in the fridge. It raises the internal temperature. That’s a food safety issue.
Once cooled, transfer to containers with tight-fitting lids.
It’ll keep for 5 days. Maybe 6 if your fridge is really cold.
The stew gets better with age. Day two is good. Day three is even better. The flavors deepen and meld together.
Freezing for Later
Portion the stew into individual serving sizes. Single portions thaw faster. Plus you can grab exactly what you need.
Use containers that seal well. Or heavy-duty freezer bags. Squeeze out as much air as possible.
Label everything. Date. Contents. Otherwise it becomes a mystery game three months later.
Freeze flat if you can. They stack better. And thaw more evenly.
Use within 2 months for best quality. It’ll be safe longer. But the texture starts to suffer after that.
Reheating Without Ruining It
Stovetop is best. Place the stew in a pot over medium-low heat. Stir occasionally. Add a splash of broth if it seems thick.
You want it heated through. Not boiling. Boiling makes the meat tough.
Microwave works too. Use a microwave-safe bowl with a cover. Heat in 1-minute bursts. Stir between each burst.
This prevents hot spots. Nobody likes scalding their mouth on nuclear-hot vegetables while the beef is still cold.
Aim for 165°F internal temperature. That’s the safe zone.
The Numbers (For Those Who Track)
Here’s what you’re getting per serving:
- Calories: 340
- Total Fat: 22g
- Saturated Fat: 6g
- Cholesterol: 95mg
- Sodium: 380mg
- Total Carbohydrates: 6.1g
- Dietary Fiber: 1.6g
- Net Carbs: 4.5g
- Protein: 28g
Those macros? Pretty solid for a meal this satisfying.
The protein keeps you full. The fat keeps you satiated. And the net carbs? Low enough that you’ve got room for other foods throughout the day.
My Final Thoughts
Here’s what I want you to know about this stew…
Eating keto doesn’t mean giving up comfort food. It doesn’t mean sad, boring meals. And it definitely doesn’t mean your family has to eat different food than you.
This stew proves that.
It’s rich. It’s hearty. It’s satisfying. And it keeps you in ketosis.
My husband asks for this on cold Sundays. My kids don’t complain about it. That alone is a miracle.
Make a big batch. Enjoy it all week. Watch the flavors improve each day.
And know that you’re feeding yourself (and your family) something that’s both delicious and nourishing.
That’s the sweet spot, isn’t it?
Good food that’s also good for you.
Try this recipe. I think you’ll love it as much as we do.
Quick Recipe Summary
What it is: Tender beef chunks and low-carb vegetables in thick, savory broth
Why it works: Slow cooking breaks down the meat. Glucomannan thickens without carbs. Fresh herbs add incredible flavor.
How to make it: Brown beef. Sauté aromatics. Add liquid. Cook low and slow. Add vegetables. Thicken at the end.
Cooking options: Dutch oven (my favorite), slow cooker (most hands-off), or Instant Pot (fastest)
Best for: Meal prep, family dinners, cold weather comfort, satisfying keto meals
Now get cooking. Your kitchen is about to smell amazing.

Keto Beef Stew
Ingredients
- 2 lb beef stew meat 907 g, chuck roast cut into 1-inch chunks
- Salt to taste
- Black pepper to taste
- 3 tbsp avocado oil divided
- 1/2 cup onion 80 g, diced
- 1 stalk celery chopped
- 2 tbsp fresh rosemary chopped
- 1 tbsp tomato paste
- 2 cloves garlic minced
- 1 cup beef broth 240 g, low-sodium
- 1 medium zucchini chopped
- 1 small turnip cubed
- 1/2 small carrot optional
- 1/2 tsp glucomannan
Instructions
- Prep the Beef:
- Pat beef chunks completely dry with paper towels
- Season generously with salt and pepper on all sides
- Preheat oven to 325°F
- Brown the Beef:
- Heat Dutch oven over medium-high heat with 1 tablespoon oil
- Add half the beef, leaving space between pieces
- Brown for 2-3 minutes per side until golden-brown crust forms
- Remove to a bowl and repeat with second batch using another tablespoon oil
- Build the Flavor Base:
- Add remaining tablespoon oil to pot
- Sauté onion and celery for 4 minutes until soft
- Add rosemary, tomato paste, and garlic
- Stir constantly for 1 minute until fragrant
- Create the Braising Liquid:
- Pour in beef broth and bring to a simmer
- Scrape up all browned bits from bottom of pot with wooden spoon
- Return beef and any collected juices to the pot
- Oven Braise:
- Cover Dutch oven with lid
- Place in preheated oven for 1 hour without opening
- Add Vegetables:
- Remove pot from oven carefully
- Add zucchini, turnip, and carrot (if using)
- Stir to combine, cover, and return to oven for 30-45 minutes until vegetables are fork-tender
- Thicken the Stew:
- Remove pot from oven
- Push meat and vegetables to one side
- Sprinkle glucomannan over exposed liquid
- Whisk quickly to prevent clumping
- Let sit for a few minutes to thicken
Notes
Instant Pot Method: Use Sauté function to brown beef in batches. Sauté aromatics. Use only ½ cup broth. Cook on Stew function for 20 minutes with natural pressure release. Add vegetables and cook for another 15 minutes.
Thickener Substitute: Use ¼ teaspoon xanthan gum instead of glucomannan. Whisk into ½ cup cooled broth first to prevent clumping, then add back to stew.
Storage: Refrigerate in airtight container for up to 5 days. Freeze in portions for up to 2 months.
Best Results: Stew tastes even better on day two as flavors meld together.
Nutrition per serving: 340 calories | 22g fat | 6.1g total carbs | 1.6g fiber | 4.5g net carbs | 28g proteinClaude is AI and can make mistakes. Please double-check responses.