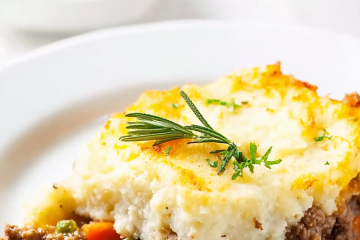
You know that moment when you bite into something crispy and hit a pocket of melted cheese?
Pure magic.
That’s what we’re making today. Keto broccoli cheese bites that’ll make you forget you’re eating low-carb. They’re crispy on the outside, gooey on the inside, and packed with flavor.
Look, I’m going to be honest with you. Deep frying usually isn’t my thing. The oil splatters everywhere. Your kitchen smells like a fast-food joint for days. And the cleanup? Don’t even get me started.

But then I saw a picture of fried cheese appetizers online.
Those golden little balls of happiness just stared at me through the screen. I couldn’t stop thinking about them. What if I could make a keto version? What if I added broccoli to make them a bit healthier?
The idea wouldn’t leave me alone.
So I got to work. And here’s the thing—this wasn’t easy at first. Making fried cheese balls without regular breadcrumbs is tricky. Really tricky.
My first attempt? Total disaster. The cheese melted right into the oil. Everything separated. I stood there looking at this greasy mess thinking, “Well, that was a waste of good cheese.”
But I’m stubborn. I tried again. And again.
After about five kitchen experiments (and way too much oil), I finally figured it out. The secret? A triple-layer coating and really good freezing time. Now these come out perfect every single time.
Why This Actually Works
Let me break down the science here. Not because I want to bore you—but because understanding why things work makes you a better cook.
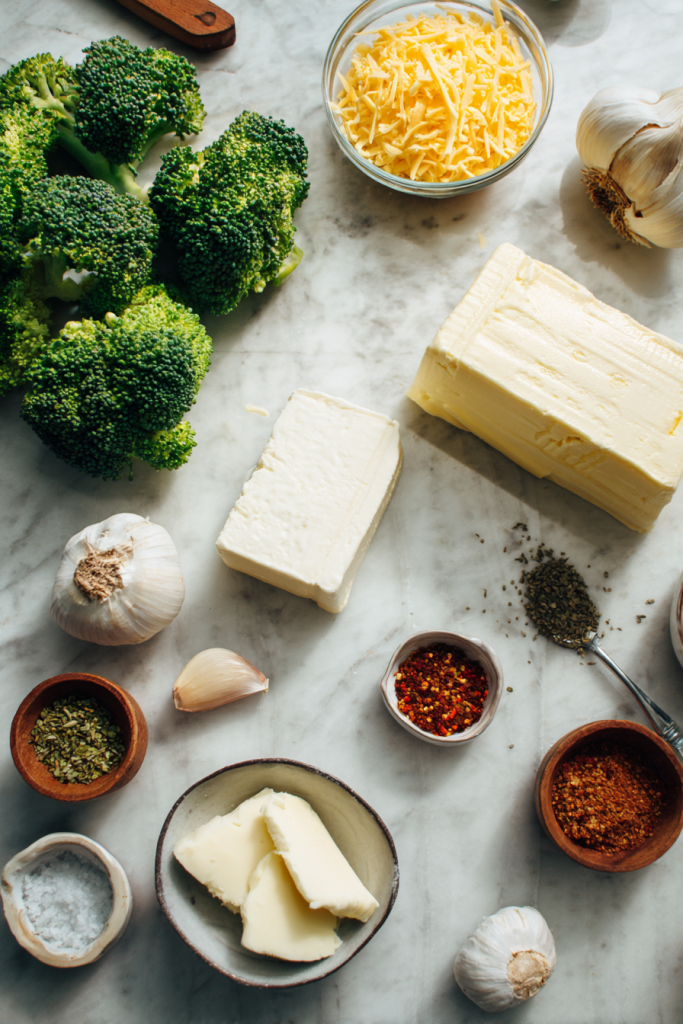
The cream cheese is your friend.
It’s soft enough to mix easily but firm enough to hold everything together. Plus, it adds this incredible richness that regular cheese alone can’t match.
The cheddar brings the flavor.
Sharp cheddar is key here. You want that tangy bite. Don’t use mild cheddar—it’s too boring.
The broccoli isn’t just filler.
I know some of you are thinking, “Do I really need the broccoli?” Yes. You do. It adds bulk without carbs. It gives you nutrients. And honestly? The subtle earthy flavor balances out all that rich cheese.
I chop mine really fine. Like, almost minced. This way it spreads evenly through every bite instead of leaving you with big broccoli chunks.
Now here’s where it gets interesting.
Regular fried food uses breadcrumbs. Those breadcrumbs have gluten. That gluten makes them stick together and get crispy. We can’t use that on keto.
So what’s the solution?
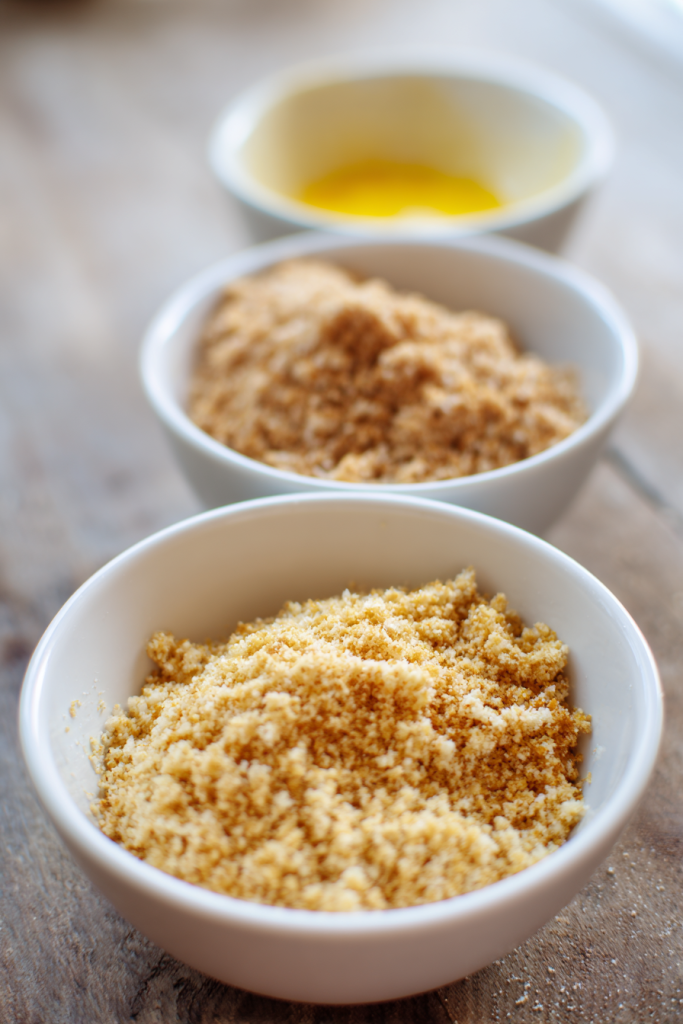
Pork rind crumbs.
They’re crunchy. They’re carb-free. They taste amazing. But here’s the problem—they don’t stick easily. There’s no gluten to hold them on.
That’s why we need the coconut flour first, then the egg wash, then the pork rinds. It’s like building layers. Each one helps the next one stick.
The freezing step? Non-negotiable.
I learned this the hard way. If you skip it, your cheese balls will hit that hot oil and just… fall apart. You’ll end up with cheese soup instead of crispy bites.
Freeze them solid. I mean rock solid. Overnight is even better than the minimum 3-4 hours.
What They Taste Like
These aren’t one-note. Every bite gives you something different.
The garlic hits you first. Just a subtle aroma. Then the red pepper flakes kick in with a little heat. Not too much—just enough to wake up your taste buds.
The cream cheese and sharp cheddar create this tangy, rich base. It’s luxurious. It’s comfort food at its finest.
And that pork rind coating? It adds this savory, almost bacon-like quality that makes you think, “Wait, is there bacon in this?”
(There isn’t. But it tastes like there should be.)
The texture is where these really shine. You bite through that crispy shell—crack—and then you hit the creamy, melty cheese center. Your teeth sink right in.
It’s the kind of appetizer you’d pay $12 for at a restaurant. Except you’re making it in your own kitchen.
Let’s Make These Things
What You’ll Need
For the Cheese Balls:
| Ingredient | Quantity | Notes |
|---|---|---|
| Frozen broccoli | 1½ cups (170g) | Thawed and well-drained |
| Cream cheese | 8 oz (226.8g) | Must be softened |
| Cheddar cheese | 6 oz (170.1g) | Freshly grated preferred |
| Garlic | 3 cloves | Minced or pressed |
| Red pepper flakes | ¼ tsp | Adjust for heat preference |
| Salt | ¾ tsp | Fine sea salt works best |
| Black pepper | ½ tsp | Freshly ground |
For the Breading:
| Ingredient | Quantity | Notes |
|---|---|---|
| Coconut flour | 2 tbsp | Creates first coating layer |
| Eggs | 2 large | Room temperature |
| Heavy cream | 1 tbsp | Enriches egg wash |
| Pork rind crumbs | 1½ cups (120g) | Finely ground |
For Frying:
| Ingredient | Quantity | Notes |
|---|---|---|
| Frying oil | 3-4 cups (672g) | Avocado, refined olive, or coconut oil |
Here’s How We Do This
Step 1: Make the Base
Grab your thawed broccoli and chop it up fine. Really fine. You’re going for small bits, not chunks. Nobody wants to bite into a big piece of broccoli stem.
Toss it in a large bowl.
Now add your softened cream cheese, grated cheddar, minced garlic, red pepper flakes, salt, and pepper.
Here’s where you need to get physical with it.
Grab a sturdy fork and mash everything together. Hard. You’re not just mixing—you’re combining these ingredients until they’re basically one thing.
No white streaks of cream cheese should be visible. If you see cream cheese streaks, keep mashing.
Step 2: Roll and Freeze
Line a baking sheet with waxed paper.
Scoop out some mixture and roll it into a ball between your palms. Keep it under one inch across. This is important—bigger balls won’t cook through properly.
Place each ball on the sheet. Make sure they’re not touching.
Now here’s where patience comes in.
Slide that sheet into your freezer. Set a timer for 3-4 hours minimum. Better yet? Leave them overnight.
They need to be completely frozen. Like, hard as rocks. Not just firm—frozen.
Step 3: Breading Station Setup
Get three shallow dishes or bowls.
Put coconut flour in the first one. Whisk your eggs and cream together in the second one until smooth. Spread pork rind crumbs in the third.
Line them up in that order. You’ll be working assembly-line style.
Step 4: Heat That Oil
Pour your oil into a deep, heavy pot. I use a 4-quart Dutch oven. Clip a candy thermometer to the side.
Turn the heat to medium and wait. Watch that thermometer climb slowly to 350°F.
Don’t rush this part. If you crank the heat too high, the oil might get too hot before you notice.
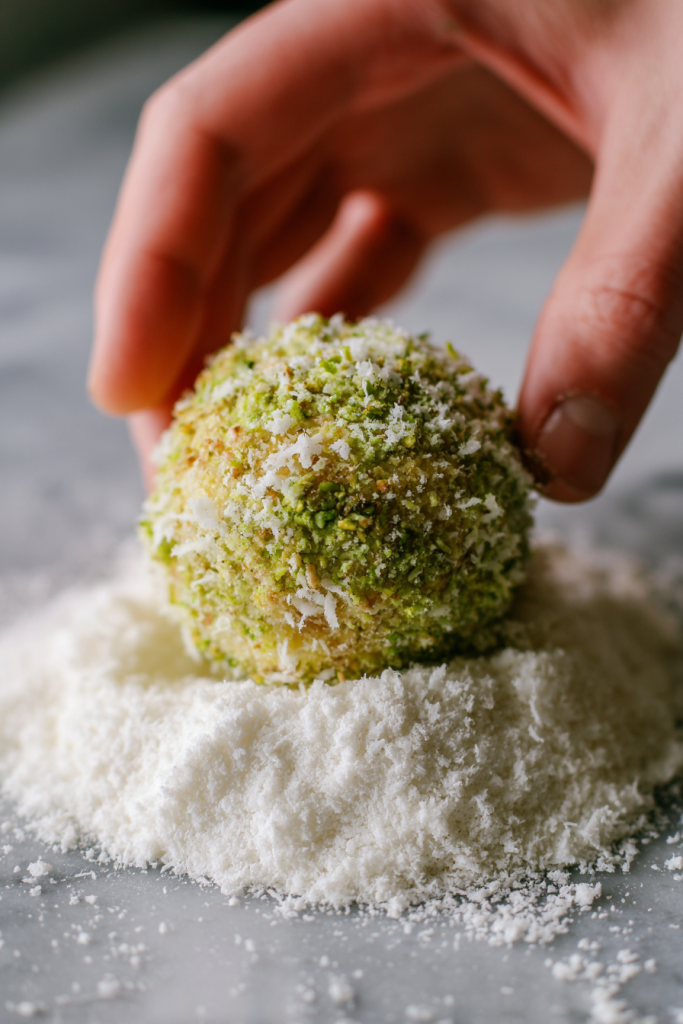
Step 5: Bread and Fry (The Fun Part)
Pull those frozen balls straight from the freezer. Work quickly so they don’t thaw.
Roll one in coconut flour first. Shake off the excess.
Dip it in the egg mixture. Let the extra drip off.
Roll it through the pork rind crumbs. Press gently so they stick.
Drop 4-6 coated balls into the hot oil at once. You’ll hear that satisfying sizzle.
Here’s the crucial part: watch your temperature.
Keep it between 330°F and 350°F. If it gets too hot, your coating burns before the cheese melts. Too cool, and you get greasy, soggy bites.
Fry for about 3 minutes. Turn them occasionally with a slotted spoon. They should come out deep golden brown—like a perfect piece of fried chicken.
Scoop them out and let them drain on paper towels. Repeat with the rest of your balls.
Between batches, let the oil come back to temperature. This takes a minute or two.
Step 6: The Waiting Game
I know they look amazing. I know they smell incredible.
But do not eat them right away.
The cheese inside is literally molten lava. It will burn the roof of your mouth. I learned this the hard way.
Let them cool for at least 10 minutes. Room temperature is actually perfect for these.
Tips That’ll Save Your Sanity
Temperature is everything.
Seriously. That thermometer isn’t optional. Too hot = burnt outside, cold inside. Too cool = greasy mess. Stay between 330-350°F.
Don’t crowd the pot.
I know you’re hungry. I know you want to fry them all at once. Don’t do it. When you add too many at once, the oil temperature drops fast. Your bites come out soggy.
Four to six at a time. That’s it. Be patient.
Pick good oil.
I use mostly refined olive oil with some avocado oil mixed in. You can also use coconut oil.
Skip the vegetable oil and canola oil. They’re not great for you, and they don’t taste as good.
Size actually matters.
Keep those balls at one inch max. Any bigger and the outside will burn before the inside cooks through.
I use a small cookie scoop to keep them consistent. Makes life easier.
Don’t Want to Deep Fry? Try This Instead
Look, I get it. Not everyone wants to deal with hot oil. Some of you are thinking, “This sounds amazing but there’s no way I’m deep frying anything.”
Good news.
You can make these in an air fryer.
Prepare everything exactly the same through the freezing and breading steps. Then line your air fryer basket with perforated parchment paper. Or just brush it with a little oil.
Put the breaded balls in a single layer. Don’t let them touch.
Spray the tops lightly with avocado or coconut oil spray. This helps them crisp up.
Air fry at 375°F for 6-8 minutes. Check them after 6.
They’ll flatten out a bit during cooking. They won’t be perfectly round. But you know what? The flavor and texture are still excellent.

How to Serve These
These work best as appetizers. I put them on a platter with some toothpicks stuck in them. Makes them easy to grab at parties.
Everyone loves them with sugar-free marinara for dipping. Sometimes I make a quick ranch dip too.
You can also serve them as a side dish. They go great with grilled steak or roasted chicken. Makes the whole meal feel more complete.
Game day? These disappear in minutes. I’m talking fast. People hover around the platter.
Last Super Bowl party, I made a double batch. Still ran out before halftime.
Storing and Reheating
Got leftovers? (Lucky you.)
Put them in an airtight container in the fridge. They’ll keep for 3 days.
To reheat: Use your oven at 350°F for 8-10 minutes. This brings back the crispiness.
Don’t microwave them. Trust me. The microwave turns them into sad, soggy balls of disappointment.
Can you freeze the cooked ones?
Yes, but the texture isn’t quite as good. Freeze them in a single layer first, then transfer to a freezer bag once solid.
When you want to eat them, reheat from frozen in the oven at 375°F for 12-15 minutes.
Questions You’re Probably Asking
Q: Can I skip the freezing to save time?
No. Just… no.
I tried this. It was a disaster. The cheese mixture needs to be solid when it hits that hot oil. Otherwise, everything falls apart into a greasy puddle.
Take the time to freeze them properly. Your future self will thank you.
Q: What if I don’t have pork rinds?
Pork rinds are really the only thing that works for keto-friendly breading here. Almond flour will burn at these temperatures. Coconut flour alone won’t get crispy enough.
If you absolutely can’t use pork rinds, try the air fryer method with just a light coconut flour coating. Won’t be quite the same, but it’s better than nothing.
Q: My coating keeps falling off. Help!
This usually means two things:
- Your balls aren’t frozen solid enough
- You’re skipping the coconut flour layer
That first flour coating is crucial. It gives the egg something to grab onto. The egg gives the pork rinds something to stick to.
Don’t skip steps. Follow the order.
Q: Can I make these ahead for a party?
Absolutely.
Shape and freeze the unbreaded balls up to a week ahead. Keep them in a freezer bag. Then bread and fry them the day of your party.
Or fry them completely the night before and reheat them in the oven right before serving.
Q: How do I know the oil is the right temperature?
Get a thermometer. Really. Don’t try to guess.
Don’t have a thermometer? Drop a small piece of bread in the oil. If it browns in about 60 seconds, you’re at 350°F.
Q: Are there alternatives to pork rinds?
Some companies make plant-based “rinds” from mushrooms or other vegetables. I haven’t tried them all, but they might work.
Results will vary. But if you can’t eat pork, they’re worth experimenting with.
Final Thoughts
These keto broccoli cheese bites changed how I think about low-carb cooking.
They prove you don’t need flour to make something crispy and delicious. You don’t need breadcrumbs to create the perfect coating. You just need to think differently about ingredients.
Yes, they take some planning ahead. That freezing time isn’t negotiable.
But the actual hands-on work? Maybe 30 minutes total. The rest is just waiting.
And when you bite into one of these—crispy coating giving way to that melted cheese center—you’ll understand why it’s worth it.
My husband doesn’t even like broccoli. He ate seven of these in one sitting.
Make a batch this weekend. See what happens.
I’m betting they don’t last long.
Nutritional Information (per serving of 2 bites):
| Nutrient | Amount |
|---|---|
| Calories | 167 kcal |
| Fat | 14.3g |
| Protein | 8.5g |
| Carbohydrates | 2.4g |
| Fiber | 0.7g |
| Net Carbs | 1.7g |
Note: Nutritional values are estimates and may vary based on specific ingredients used.

Keto Broccoli Cheese Bites
Ingredients
For the Cheese Balls
- 1.5 cups frozen broccoli thawed and well-drained (170g)
- 8 oz cream cheese softened (226.8g)
- 6 oz cheddar cheese freshly grated preferred (170.1g)
- 3 cloves garlic minced or pressed
- 0.25 tsp red pepper flakes adjust for heat preference
- 0.75 tsp salt fine sea salt works best
- 0.5 tsp black pepper freshly ground
For the Breading
- 2 tbsp coconut flour
- 2 large eggs room temperature
- 1 tbsp heavy cream
- 1.5 cups pork rind crumbs finely ground (120g)
For Frying
- 3-4 cups frying oil avocado, refined olive, or coconut oil (672g)
Instructions
- Chop the thawed broccoli very fine, almost minced. Place in a large bowl.
- Add softened cream cheese, grated cheddar, minced garlic, red pepper flakes, salt, and pepper to the bowl.
- Using a sturdy fork, mash everything together until fully combined with no white cream cheese streaks visible.
- Line a baking sheet with waxed paper. Scoop mixture and roll into balls under 1 inch in diameter. Place on sheet without touching.
- Freeze the balls for 3-4 hours minimum, or overnight until completely frozen solid.
- Set up breading station with three shallow dishes: coconut flour in first, eggs whisked with cream in second, pork rind crumbs in third.
- Pour oil into a deep, heavy pot (4-quart Dutch oven works well). Heat to 350°F, using a candy thermometer to monitor temperature.
- Working quickly with frozen balls, roll each in coconut flour, then dip in egg mixture, then coat with pork rind crumbs, pressing gently.
- Drop 4-6 breaded balls into hot oil at 350°F. Fry for about 3 minutes, turning occasionally, until deep golden brown.
- Remove with slotted spoon and drain on paper towels. Let oil return to temperature between batches.
- Let cool for at least 10 minutes before serving to avoid burns from molten cheese center.