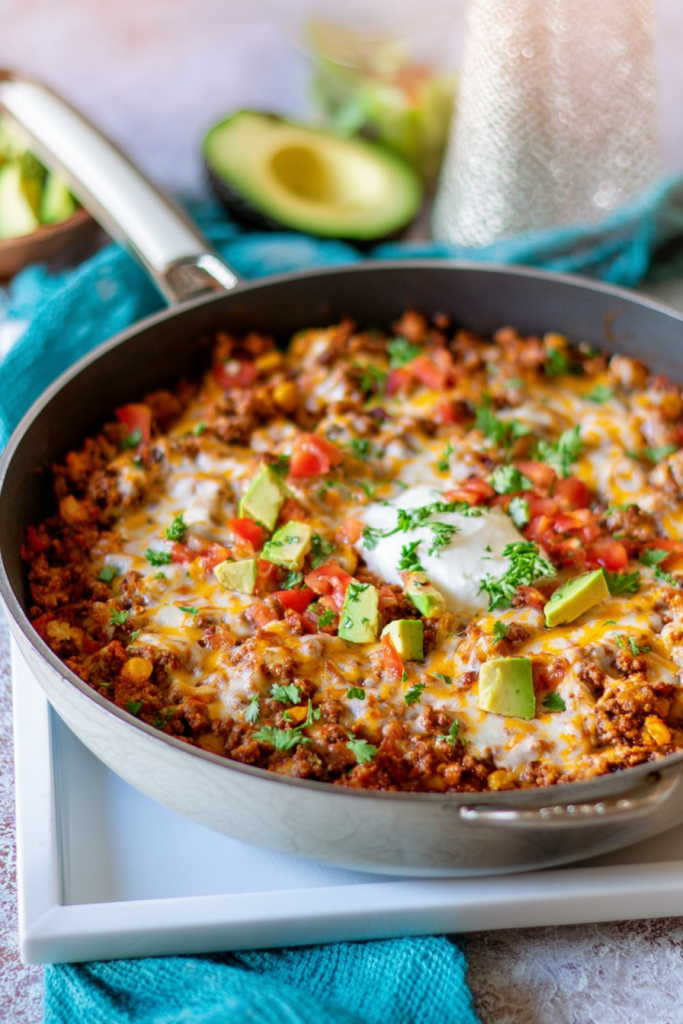
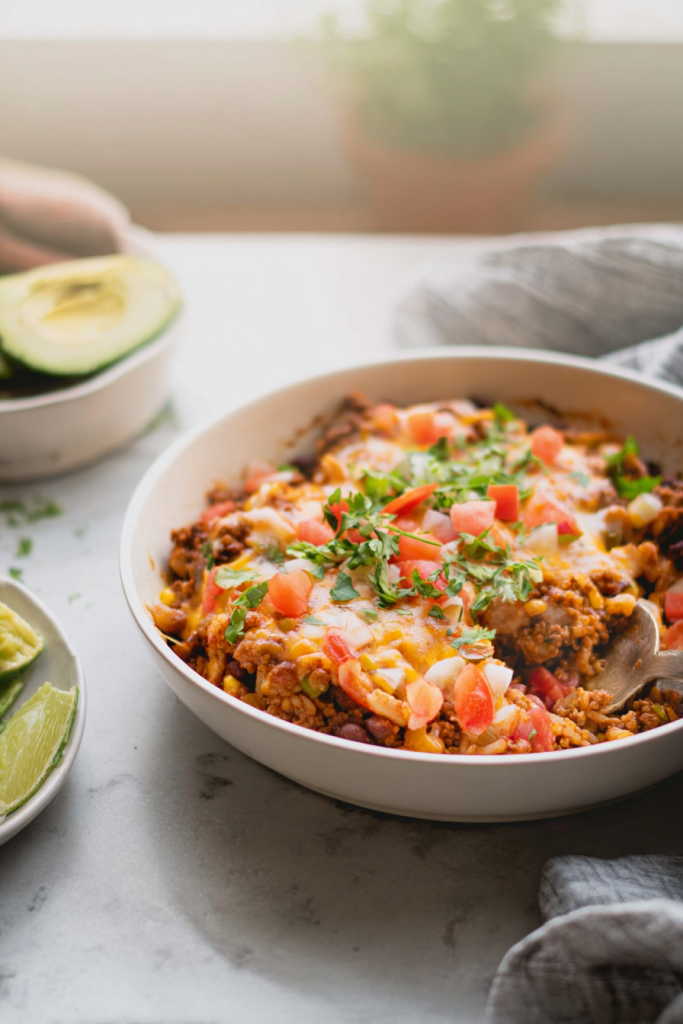
Easy, cheesy, and packed with flavor — all done in a single pan in under an hour.
Some recipes just earn a permanent spot in your weekly rotation. This one pot taco skillet is exactly that for me.
I’m not exaggerating when I say this dish saved me on more than one chaotic weeknight. It pulls together bold, satisfying taco flavors without the mess of assembling individual tacos. Everything cooks in one pan. The ground beef, the bell peppers, the rice, all the savory goodness that ties it together.
The best part? You get a complete meal from a handful of pantry staples. No fancy techniques. No complicated timing. Just real food, fast.
I first threw this together on a Tuesday evening when the fridge was looking pretty bare. Ground beef, a can of tomato sauce, some rice, and bell peppers. What started as a “figure it out” dinner became something my family now requests by name. That says everything.
If you need a reliable, filling dish for busy nights, this recipe delivers every single time.
Why This Recipe Actually Works
Let me break down what makes this skillet so good.
One pan, zero stress. You start and finish everything in a single skillet. Fewer dishes mean less time cleaning up and more time actually relaxing after dinner.
The rice cooks right in the sauce. Instead of cooking rice separately, it absorbs the broth and tomato sauce as it simmers. This makes every grain incredibly flavorful. Not bland. Not plain. Actually delicious.
It is incredibly versatile. Serve it as-is in a bowl, stuff it into taco shells, pile it over lettuce, or scoop it with tortilla chips. One recipe, multiple meals.
The ingredient list is short and simple. You probably have most of these on hand already. No hunting for specialty items at the grocery store.
Recipe Timing and Servings
| Detail | Info |
|---|---|
| Prep Time | 10 minutes |
| Cook Time | 35 minutes |
| Total Time | 45 minutes |
| Servings | 4 |
| Difficulty | Easy |
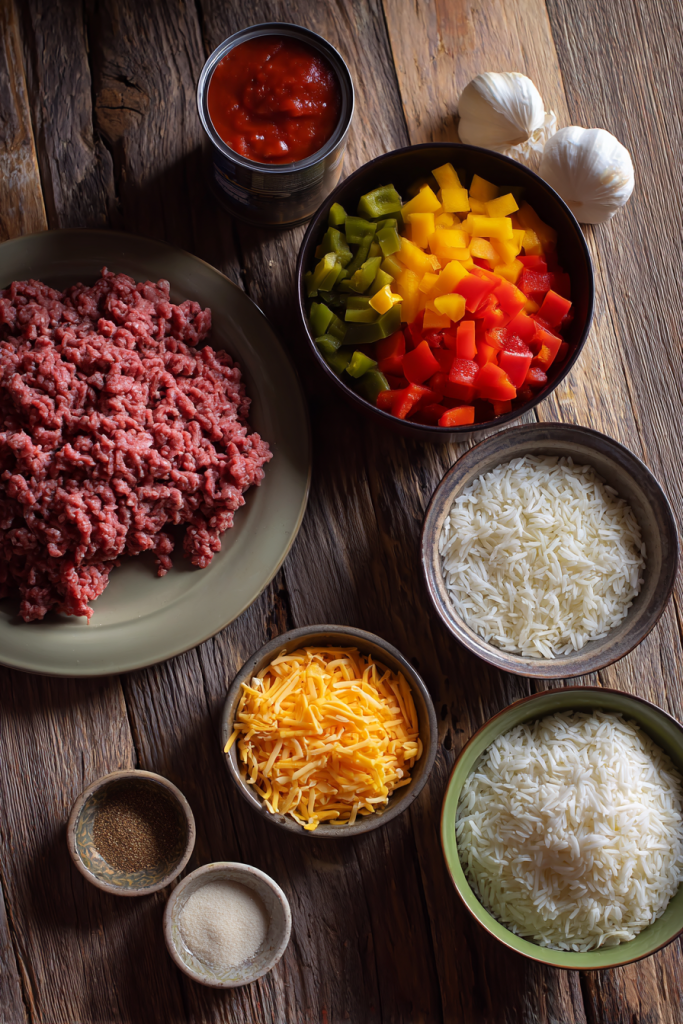
What You Will Need
Here is everything that goes into this dish. Ten ingredients. All easy to find.
| Ingredient | Quantity | Notes |
|---|---|---|
| Olive oil | 1 tbsp | Avocado oil or butter works too |
| Ground beef | 1 lb | 85/15 blend recommended for flavor |
| Onion | ½ cup | Diced; yellow or white onion |
| Minced garlic | 1 tbsp | Fresh or jarred, both work |
| Taco seasoning | ½ tbsp | Homemade or store-bought low-sodium |
| Tomato sauce (canned) | 15 oz | NOT pasta sauce; use low/no salt |
| Dry white rice | 1 cup | Long-grain; not instant or short-grain |
| Beef broth | 2 cups | Low or no salt variety preferred |
| Bell peppers | 3 cups | Diced; any color or a mix |
| Shredded cheddar cheese | 1 cup | Freshly grated melts best |
Ingredient Notes and Easy Swaps
Ground Beef: I use 85/15 for the best balance of flavor and moisture. Going leaner like 90/10 works too, but the dish may be slightly less rich. Ground turkey or ground chicken are great lighter options. Just expect a milder taste overall.
Tomato Sauce: This is the base liquid that makes the rice so flavorful. Use plain canned tomato sauce, not jarred pasta sauce. Pasta sauce is thick and already seasoned. It will throw off both the texture and the flavor of the whole dish. This is one swap I really do not recommend making.
Beef Broth: Stick with low-sodium or no-salt-added broth. Chicken broth or vegetable broth also works if that is what you have on hand. They all do the job well.
White Rice: Long-grain white rice works best here. It absorbs liquid evenly and cooks through in the right amount of time. Avoid instant rice (it turns to mush) and short-grain rice (it clumps). Regular long-grain is the move.
Bell Peppers: Use any color you like. Red and orange peppers are a little sweeter. Green peppers bring a more savory edge. A mix of colors makes the dish look beautiful and adds a nice range of flavors.
Cheddar Cheese: Grate it fresh from a block. Pre-shredded cheese has anti-caking coatings that mess with how it melts. A freshly grated handful melts into a smooth, creamy layer. Trust me on this one.
Taco Seasoning: The recipe calls for just half a tablespoon, which gives you warm, lightly spiced flavor. If you love a bolder kick, bump it up to a full tablespoon. Making your own blend with chili powder, cumin, garlic powder, and paprika is also a great way to keep sodium in check.
Optional Add-Ins Worth Trying
Want to take it a step further? Here are a few easy additions:
- Stir in one cup of rinsed and drained black beans or pinto beans for extra protein and fiber
- Add a small can of diced green chiles for a mild, smoky heat
- A pinch of cayenne pepper in the seasoning adds a nice background warmth
- Corn kernels (canned or frozen) bring a touch of sweetness and color
How to Make It: Step by Step
This recipe comes together in four simple stages. Follow these and you cannot go wrong.
Step 1: Brown the Ground Beef
Pour the olive oil into a large skillet or deep sauté pan and set it over medium heat. Once the oil shimmers, add the ground beef.
Break the meat apart with a wooden spoon or spatula as it cooks. You want small, even crumbles. Not large chunks. Cook for about 10 minutes until no pink remains.
Now add the diced onion and minced garlic directly to the pan. Sauté everything together for another 5 minutes. The onions will soften and turn slightly golden. The garlic will smell incredible.
Pro tip: Do not drain the fat unless there is an excessive amount pooling. A little beef fat adds richness and carries the taco seasoning flavor beautifully.
Step 2: Build the Sauce and Add the Rice
Now the pan starts to smell truly amazing. Add the taco seasoning and stir it into the beef and onion mixture. Let it cook for about 30 seconds. This step deepens the flavor in a way that skipping it just does not replicate.
Pour in the tomato sauce, beef broth, and dry white rice. Add the diced bell peppers. Stir everything together until well combined.
Bring the mixture to a full boil over medium-high heat, then immediately reduce the heat to low and cover the pan with a tight-fitting lid.

Step 3: Simmer Until the Rice Is Tender
This is where patience pays off. Let the skillet simmer, covered, for 20 to 25 minutes. The rice needs this time to absorb the liquid and cook through completely.
Stir the mixture gently every 8 to 10 minutes. This prevents the rice from sticking to the bottom and keeps everything cooking evenly.
After 20 minutes, test a small spoonful of rice. It should be tender all the way through. If there is still a bit of crunch, replace the lid and give it another 5 minutes.
Pro tip: If the liquid looks like it is running dry before the rice finishes, add a splash of broth. About ¼ cup at a time. Keep the heat on low to avoid scorching the bottom.
Step 4: Top with Cheese and Serve
Once the rice is fully cooked, sprinkle the shredded cheddar evenly across the surface of the skillet. Place the lid back on and let it sit for one full minute over low heat.
The residual heat melts the cheese into a smooth, golden layer without overcooking anything underneath. Remove the lid and take a moment to appreciate what you just made.
Bring the skillet straight to the table. Let everyone dig in.
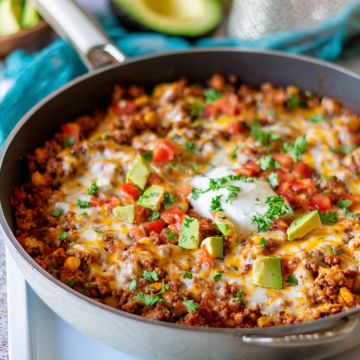
How to Serve This
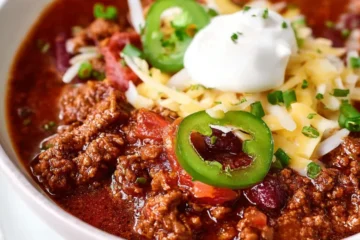
This dish is a complete meal on its own. Scoop it into bowls and pile on your favorite toppings.
Here are my personal favorites:
- Sliced avocado or a spoonful of guacamole
- A dollop of sour cream or plain Greek yogurt
- Fresh or jarred salsa
- Shredded romaine lettuce
- Sliced jalapeños or pickled jalapeños
- Chopped fresh cilantro and a wedge of lime
- A handful of crunchy tortilla chips on the side
You can also use the filling to build tacos in corn or flour tortillas, roll burritos, or spoon it over shredded lettuce for a warm taco salad. Really versatile stuff.
Storing and Reheating Leftovers
| Method | How Long | Notes |
|---|---|---|
| Refrigerator | Up to 3 days | Store in an airtight container |
| Freezer | Up to 3 months | Portion into freezer-safe containers |
| Reheat from fridge | 2-3 minutes (microwave) | Add a splash of broth to loosen rice |
| Reheat from frozen | Thaw overnight first | Then reheat on stove or microwave |
From the fridge: Warm in a skillet over low heat with a splash of broth. Stir as it heats to keep the rice from clumping.
From the freezer: Thaw overnight in the refrigerator, then reheat as above. In a pinch, you can microwave it straight from frozen using shorter intervals and stirring frequently.
Tips for Getting This Right Every Time
I have cooked this dish more times than I can count. Here is what actually makes a difference:
- Use a large, deep pan. The rice expands as it absorbs liquid. A 12-inch skillet or wide sauté pan with at least 2-inch sides prevents overflow and allows for even cooking.
- Keep the lid on during simmering. Lifting it repeatedly lets steam escape. That steam is what cooks the rice from above. Every peek adds a minute or two to the cook time.
- Grate your own cheese. Pre-packaged shredded cheese contains starches that prevent smooth melting. A block of cheddar grated right before use melts into a silky, even layer.
- Taste before serving. Every brand of taco seasoning and broth has a different sodium level. Give it a quick taste after the rice finishes cooking and adjust salt if needed.
- Use low or no-salt broth and tomato sauce. This gives you full control over the final saltiness. Salty broth plus salty seasoning can make the whole thing too intense.
- Prep your veggies in advance. Diced bell peppers can be stored in an airtight container in the fridge for up to 48 hours before cooking. On a weeknight, that small step saves real time.
Frequently Asked Questions
Can I use ground turkey instead of ground beef?
Absolutely. Ground turkey is a leaner option and works really well here. The flavor will be slightly milder, so you may want to add an extra pinch of taco seasoning to compensate. Ground chicken is another solid swap.
What is the difference between tomato sauce and pasta sauce?
Tomato sauce is thin, plain, and unseasoned. It blends seamlessly into the dish. Pasta sauce like marinara is thick, heavily seasoned, and will overpower the taco flavors. Always reach for plain canned tomato sauce for this recipe. It is not a small difference.
Can I add beans to this recipe?
Yes! One cup of rinsed and drained black beans or pinto beans is a fantastic addition. Stir them in along with the rice and broth. They add extra fiber, plant-based protein, and a heartier texture.
My rice is still crunchy after 25 minutes. What do I do?
This can happen if the lid was not kept on tightly, or if the heat was too high and liquid evaporated too quickly. Add a splash of broth, about ¼ cup, replace the lid, and continue simmering on low for another 5 to 10 minutes.
Can I make this ahead of time?
Absolutely. This dish is excellent for meal prep. Cook it fully, let it cool, and store it in an airtight container in the refrigerator for up to 3 days. For longer storage, freeze for up to 3 months. Reheat on the stove over low heat or in the microwave, adding a splash of broth if the rice seems dry.
Full Recipe Card
One Pot Taco Skillet
Prep Time: 10 minutes | Cook Time: 35 minutes | Total Time: 45 minutes | Servings: 4
Ingredients
- 1 tablespoon olive oil
- 1 lb ground beef
- ½ cup onion, diced
- 1 tablespoon minced garlic
- ½ tablespoon taco seasoning
- 15 oz can tomato sauce (not pasta sauce; use low/no salt)
- 1 cup dry white rice
- 2 cups beef broth (low or no salt)
- 3 cups bell pepper, diced
- 1 cup shredded cheddar cheese
Instructions
- Heat olive oil in a large skillet over medium heat. Add the ground beef and cook for 10 minutes, breaking it into crumbles, until no longer pink.
- Add the diced onion and minced garlic. Sauté for 5 more minutes, stirring occasionally, until the onion is softened and lightly golden.
- Add the taco seasoning and stir to coat. Pour in the tomato sauce, beef broth, dry white rice, and diced bell peppers. Stir to combine everything.
- Cover the pan and bring to a boil. Reduce heat to low and simmer for 20 to 25 minutes, stirring every 8 to 10 minutes, until the rice is fully cooked and tender.
- Sprinkle the shredded cheddar cheese over the top. Replace the lid and let it sit for one minute until the cheese melts. Serve immediately with your favorite toppings.
Notes
- Ground beef substitute: Ground turkey or chicken works well as a leaner option
- Tomato sauce: Always use plain canned tomato sauce, not pasta sauce
- Dairy free: Simply skip the cheese or use your favorite dairy-free shredded alternative
- Add beans: Stir in 1 cup of rinsed black or pinto beans with the rice for extra filling power
- Storage: Refrigerate leftovers for up to 3 days or freeze for up to 3 months
One Pot Taco Skillet
Ingredients
- 1 tbsp olive oil avocado oil or butter works too
- 1 lb ground beef 85/15 blend recommended
- 1/2 cup onion diced, yellow or white
- 1 tbsp minced garlic fresh or jarred
- 1/2 tbsp taco seasoning homemade or store-bought low-sodium
- 15 oz canned tomato sauce NOT pasta sauce; use low or no salt
- 1 cup dry white rice long-grain; not instant or short-grain
- 2 cups beef broth low or no salt variety
- 3 cups bell peppers diced, any color or a mix
- 1 cup shredded cheddar cheese freshly grated melts best
Instructions
- Heat olive oil in a large skillet over medium heat. Add the ground beef and cook for 10 minutes, breaking it into crumbles, until no longer pink.
- Add the diced onion and minced garlic. Sauté for 5 more minutes, stirring occasionally, until the onion is softened and lightly golden.
- Add the taco seasoning and stir to coat. Cook for 30 seconds to bloom the spices.
- Pour in the tomato sauce, beef broth, dry white rice, and diced bell peppers. Stir everything together until well combined.
- Bring to a boil over medium-high heat, then reduce heat to low and cover with a tight-fitting lid. Simmer for 20 to 25 minutes, stirring every 8 to 10 minutes, until the rice is fully cooked and tender.
- Sprinkle the shredded cheddar cheese evenly over the top. Replace the lid and let sit for one minute until the cheese melts. Serve immediately with your favorite toppings.