You know what’s funny? I’ve been trying to recreate my childhood desserts for months now. And these Coconut Dream Bars? They’re the one I’m most proud of.
First bite = instant flashback to those chocolate-coconut candy bars from my youth.
The difference? These won’t kick you out of ketosis.
I spent weeks testing this recipe. Different sweeteners. Different baking times. Different everything. My kitchen looked like a coconut bomb exploded in it.
When I Knew I’d Cracked the Code
My husband is brutally honest about my keto experiments. He’ll take a bite, give me “the look,” and I know I need to start over.
Not this time.
He ate two bars. Then asked when I was making more.
That’s when I knew I’d finally nailed it.
Why These Bars Are Different
Here’s the thing about layered desserts – they can be tricky. But these? They’re actually pretty straightforward.
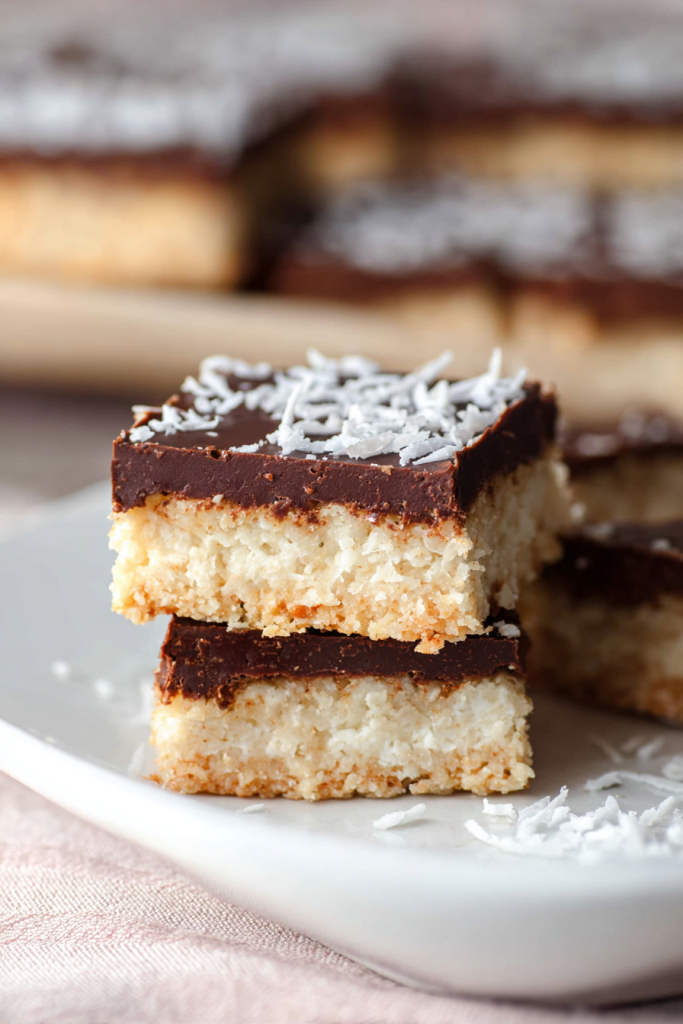
You get three distinct textures:
- Crispy almond crust at the bottom
- Gooey coconut filling in the middle
- Smooth chocolate on top
Each layer builds on the last one. It’s like baking architecture.
The filling is where the magic happens. I simmer heavy cream with sweeteners until it gets thick and caramel-like. It tastes exactly like sweetened condensed milk. No joke.
The coconut extract? That’s your secret weapon. It amplifies the tropical flavor so much that every bite feels like a mini vacation.
And despite all these layers, you’re looking at about 25 minutes of actual work. The oven does the heavy lifting.
My Epic Failure (So You Don’t Have to Repeat It)
Let me be real with you. My first batch was a disaster.
I used too much allulose in the filling. The crust turned into a soggy mess. The layers all merged together into one weird coconut blob. My husband gave me “the look.”
Back to the drawing board.
The breakthrough? Understanding that sweetener type actually matters. A lot.
Erythritol gives you structure. Allulose adds moisture. Use both in the right ratio and you get bars that slice clean but taste decadent.
Batch number three? Gone in hours. My neighbors descended like locusts. Three different people texted me asking for the recipe.
One friend who can’t eat gluten nearly cried. She’d been missing desserts like this for years.
The Numbers Don’t Lie
Each bar has only 4.2 grams of net carbs.
Traditional coconut bars? Try 30-40 grams. Per serving.
That’s a massive difference.
Plus you’re getting:
- Healthy fats from the almond flour
- MCTs from the coconut
- Antioxidants from the chocolate
I bring these to parties all the time. They look gorgeous on the dessert table. And nobody – I mean nobody – guesses they’re sugar-free.
You can eat them guilt-free and stay in ketosis. Win-win.
Prep Time: 25 minutes | Cook Time: 60 minutes | Total Time: 1 hour 25 minutes
Servings: 16 bars | Difficulty: Moderate
Let’s Make These Bars (The Easy Way)
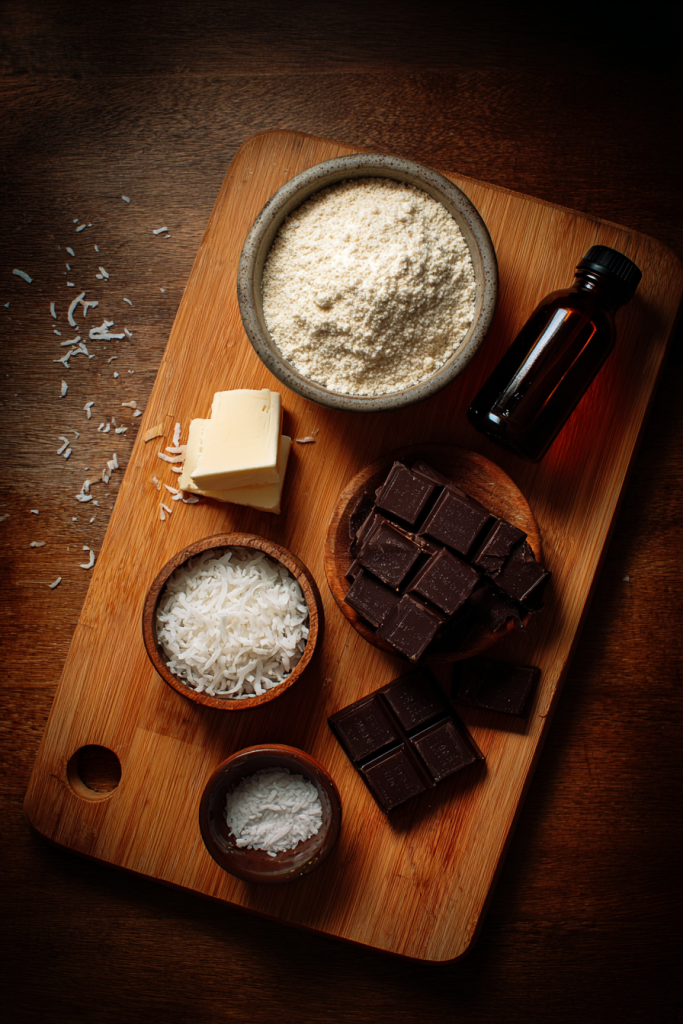
Ingredients Breakdown
For the Crust:
| Ingredient | Quantity | Notes |
|---|---|---|
| Almond flour | 1½ cups (168g) | Finely ground, blanched preferred |
| Brown sugar replacement | ¼ cup (50g) | Erythritol-based only |
| Ground cinnamon | ¼ tsp | Adds warmth to crust |
| Salt | ¼ tsp | Balances sweetness |
| Butter, melted | ¼ cup (57g) | Unsalted recommended |
For the Filling:
| Ingredient | Quantity | Notes |
|---|---|---|
| Heavy cream | 1½ cups (355ml) | Full-fat for best results |
| Powdered erythritol | 6 tbsp (73g) | Must be powdered |
| Allulose | 2 tbsp (25g) | Prevents crystallization |
| Glucomannan | ¼ tsp | Or substitute xanthan gum |
| Coconut extract | 1 tsp | Vanilla works as alternative |
| Shredded coconut | 2 cups (160g) | Unsweetened only |
For the Topping:
| Ingredient | Quantity | Notes |
|---|---|---|
| Sugar-free chocolate | 3 oz (85g) | Chopped into small pieces |
| Butter | 2 tbsp (28g) | For smooth melting |
Making the Crust (Don’t Skip the Details)
Preheat your oven to 325°F.
Why this temperature? It’s hot enough to bake the crust without burning the edges. Trust me on this.
Grab an 8×8 inch metal baking pan. Not glass. Not ceramic. Metal.
The reason? Metal conducts heat way better. You’ll get a crispier crust.
Grease it thoroughly.
Now for the dry ingredients. Toss your almond flour, brown sugar replacement, cinnamon, and salt into a medium bowl. Whisk it up. Break up any lumps you see.
That cinnamon? It’s subtle but important. It adds this warmth that makes the coconut flavor pop.
Pour in your melted butter slowly. Stir with a fork.
You’re looking for a texture like coarse crumbs. Press some between your fingers – it should clump together.
Too dry? Add another teaspoon of melted butter.
Dump this into your pan. Now comes the arm workout.
Press it down hard. Use the bottom of a measuring cup or just your hands. You want an even layer covering the entire bottom.
Pay extra attention to the corners. They always try to be thinner.
Into the oven for 15-20 minutes. You’re looking for golden brown edges. The center should look set but not dark.
Pull it out. Let it cool completely.
I repeat: completely.
This is crucial. A warm crust will turn your filling into soup.
The Coconut Filling (Where the Magic Happens)
While that crust cools, let’s tackle the filling.
Pour your heavy cream into a medium saucepan. Add both sweeteners – the powdered erythritol and the allulose. Whisk them together before you turn on any heat.
Medium heat. Bring it to a gentle simmer.
Not a rolling boil. Just a gentle bubble.
Whisk frequently. You don’t want scorching.
This step requires patience. You’ll be standing there for about 20 minutes.
I usually catch up on podcasts during this part.
Watch the cream. It needs to reduce by about a quarter of what you started with. The mixture will get noticeably thicker. When it coats the back of a spoon, you’re golden.
Kill the heat immediately.
Sprinkle the glucomannan over the surface. Whisk like crazy while you do this. If you don’t, you’ll get nasty clumps.
The mixture will thicken even more as it cools slightly.
Now for the flavor bomb – add your coconut extract. Stir it in.
Fold in all that shredded coconut. Every strand should be coated in the creamy mixture. It’ll look cohesive and glossy.
Spread this over your completely cooled crust. (Did I mention it needs to be completely cool?)
Use a spatula to get it even. Hit every corner.
Back into the oven. Another 15-20 minutes.
The edges should just start browning. The center will still be a bit soft. That’s what you want.

The Chocolate Finale
Pull your pan out. Let it cool completely again.
I know, I know. More waiting.
But here’s why – if the filling is even slightly warm, your chocolate will melt into it. You’ll lose that beautiful layer effect.
While you’re waiting, prep the chocolate topping.
Microwave method: Put your chopped chocolate and butter in a microwave-safe bowl. Zap it for 30 seconds. Stir. Repeat until smooth and glossy.
Double boiler method: Set a heatproof bowl over a pan of barely simmering water. Toss in your chocolate and butter. Stir occasionally. This is gentler and prevents burning.
Pour that melted chocolate over your cooled coconut layer.
Work quickly. Use an offset spatula to spread it to the edges.
Chocolate starts setting fast.
Stick the whole pan in the fridge. Give it 20-30 minutes.
The chocolate will firm up completely.
Now for the satisfying part – cutting. Use a really sharp knife. Slice into 16 equal bars.
Here’s the pro tip: wipe your knife clean between each cut. You’ll get those Instagram-worthy clean edges.
Pro Tips (From Someone Who’s Made Every Mistake)
The Sweetener Situation
Listen carefully. This is important.
Your crust must use erythritol-based sweetener. Zero allulose in it.
Why? I learned this the expensive way when my first batch turned into mush.
Erythritol creates structure. It gives you that crispy texture. Allulose can’t do this.
For the filling? Use the combo I listed.
Mostly erythritol + a little allulose.
Why both?
- Erythritol prevents the filling from getting too soft
- Allulose stops the erythritol from re-crystallizing into gritty bits
It’s a delicate balance. But it works.
Watch That Cream Like a Hawk
Your cream needs to reduce by about 25%.
Too little reduction? Runny filling.
Too much? Overly thick filling that won’t spread.
You’re looking for it to coat the back of a spoon nicely.
No Glucomannan? No Problem.
Try collagen peptides instead. About a tablespoon.
It thickens similarly. Plus you get bonus protein.
Going Dairy-Free
Got readers asking me about this all the time.
Yes, you can use coconut cream.
Open a can of full-fat coconut milk. Scoop out only the thick white cream from the top. Leave the watery stuff.
One heads up – coconut cream behaves differently when heated. You might need to simmer a few extra minutes to get the right thickness.
How to Store These Bad Boys
Room temperature in an airtight container? Four days.
Refrigerator? A full week. The chocolate stays nice and firm.
I usually make a double batch. Eat half, freeze half.
Wrap individual bars in parchment paper. Toss them in a freezer bag. They’ll keep for three months easy.
Thaw at room temperature for 30 minutes before eating.
Serving Suggestions
I like them slightly chilled. The chocolate gets this satisfying snap. The coconut filling becomes perfectly chewy.
Room temperature works too. The chocolate just softens a little.
Either way, they’re delicious.
Your Questions Answered
Can I use different nut flours?
Sure, you can try sunflower seed flour or other nut meals.
But fair warning – they won’t look as nice. The texture might be crumblier too.
Coconut flour? Hard pass. It sucks up too much moisture. You’ll end up with a dry, dense brick.
What if I don’t have coconut extract?
Vanilla extract works great.
You’ll lose some of that intense coconut punch. But the shredded coconut still delivers plenty of flavor.
Some people actually prefer the milder vanilla version.
Help! My layers blended together!
Two usual suspects here:
- You added filling to a warm crust (let it cool completely!)
- You used too much allulose (check your sweetener ratio)
How do I get clean slices?
Sharp knife. Really sharp.
Wipe it clean between every single cut.
Chill the bars thoroughly first. This helps a ton.
Some people warm the knife blade slightly in hot water. Creates even cleaner cuts.
Can I use less sweetener?
I’ve tested these measurements pretty carefully.
Cut back too much and you’ll mess with both texture and taste. The filling actually needs that sweetener to thicken properly during simmering.
If you really want less sweetness, try reducing by 1-2 tablespoons max. Any more and you’re rolling the dice.
These bars are now part of my regular rotation. They shut down coconut cravings while keeping my carbs in check.
Give them a shot. I think you’ll love them as much as I do.
Keto Coconut Dream Bars
Ingredients
For the Crust
- 1½ cups almond flour finely ground, blanched preferred (168g)
- ¼ cup brown sugar replacement erythritol-based only (50g)
- ¼ tsp ground cinnamon
- ¼ tsp salt
- ¼ cup butter melted, unsalted recommended (57g)
For the Filling
- 1½ cups heavy cream full-fat for best results (355ml)
- 6 tbsp powdered erythritol must be powdered (73g)
- 2 tbsp allulose prevents crystallization (25g)
- ¼ tsp glucomannan or substitute xanthan gum
- 1 tsp coconut extract vanilla works as alternative
- 2 cups shredded coconut unsweetened only (160g)
For the Topping
- 3 oz sugar-free chocolate chopped into small pieces (85g)
- 2 tbsp butter for smooth melting (28g)
Instructions
- Preheat your oven to 325°F. Grease an 8×8 inch metal baking pan thoroughly.
- In a medium bowl, whisk together almond flour, brown sugar replacement, cinnamon, and salt. Break up any lumps.
- Pour in melted butter slowly and stir with a fork until mixture resembles coarse crumbs that clump together when pressed.
- Press the crust mixture firmly into the prepared pan, creating an even layer. Pay extra attention to corners. Bake for 15-20 minutes until edges are golden brown. Let cool completely.
- For the filling, pour heavy cream into a medium saucepan. Add powdered erythritol and allulose. Whisk together before heating.
- Heat on medium, bringing to a gentle simmer. Whisk frequently for about 20 minutes until reduced by one-quarter and mixture coats the back of a spoon.
- Remove from heat. Sprinkle glucomannan over the surface while whisking vigorously to prevent clumps. Add coconut extract and stir.
- Fold in shredded coconut until every strand is coated. Spread mixture evenly over the completely cooled crust.
- Bake for 15-20 minutes until edges just start browning. The center will still be slightly soft. Remove and let cool completely.
- For the chocolate topping, melt chopped chocolate and butter together using microwave (30-second intervals, stirring between) or double boiler method until smooth and glossy.
- Pour melted chocolate over cooled coconut layer and spread quickly to edges with an offset spatula.
- Refrigerate for 20-30 minutes until chocolate firms completely. Cut into 16 equal bars using a sharp knife, wiping clean between cuts.